Quantcast
Channel: Syncfusion Blogs
Viewing all 473 articles
Browse latest View live

How to Make Stylish Gradient Backgrounds in Xamarin.Forms

$
0
0

Nowadays, applying gradients is more popular and trendier in mobile design. A gradient is a gradual blending of one color to another. It creates color combinations that feel different and modern, and they provide a completely unique feel to UI designs. In Xamarin.Forms applications, you may be asked to set a gradient background for a layout or view, but it might require additional effort to accommodate this request. Syncfusion’s aim is to make things easier and save developers time. Based on this, we have added the Gradient View to our Xamarin control collection to make stylish gradients in your applications. To add a gradient design, just include the Gradient View as a background view of your application.

The Gradient View control supports two types of gradients: linear and radial. Now, I will explain how to apply a gradient background to a Xamarin.Forms application.

Refer to this documentation to add the Gradient View reference in your application. The Gradient View contains the BackgroundBrush property, where you can specify either linear or radial gradients based on your requirements.

<gradient:SfGradientView>
        <gradient:SfGradientView.BackgroundBrush>
        </gradient:SfGradientView.BackgroundBrush>
</gradient:SfGradientView>

Apply linear gradient

A linear gradient paints a view with multiple colors that blend with each other. In general, there are three kinds of linear gradient based on its direction: horizontal, vertical, and diagonal. The default linear gradient direction is diagonal.

The StartPoint and EndPoint properties of SfLinearGradientBrush represent the start and end points of the gradient value. The default value of StartPoint is (0,0), which is the upper-left corner, and the default EndPoint is (1,1), which is the lower-right corner. To change the gradient effect direction from left to right, change StartPoint to (0,0.5) and EndPoint to (1,0.5). Similarly, to change the direction to vertical, set StartPoint to (0.5,0) and EndPoint to (0.5,1). The following MSDN image shows the linear gradient axis direction.
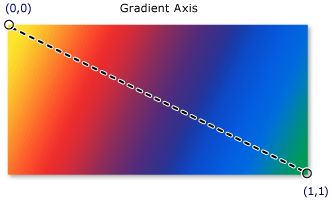
MSDN Gradient axis

Linear Gradient in Diagonal Direction

SfGradientStop is a color block of the gradient brush and it specifies a color at an offset along the gradient axis. The Color property specifies the color of the gradient stop and the Offset property specifies the position of gradient stop’s color on the gradient axis. Gradients aren’t limited to two color shades. If you are in a colorful mood, you can add any number of color shades by adding SfGradientStop to the GradientStops collection.

<gradient:SfGradientView>
      <gradient:SfGradientView.BackgroundBrush>
            <gradient:SfLinearGradientBrush StartPoint="0,0" EndPoint="1,1">
                  <gradient:SfLinearGradientBrush.GradientStops>
                        <gradient:SfGradientStop Color="#ff05cd" Offset="0.0" />
                        <gradient:SfGradientStop Color="#313196" Offset="1.0" />
                  </gradient:SfLinearGradientBrush.GradientStops>
            </gradient:SfLinearGradientBrush>
      </gradient:SfGradientView.BackgroundBrush>
</gradient:SfGradientView>

Now, you can apply this gradient view as a background view to your application to create the gradient style.

<Grid>
     <gradient:SfGradientView/>
     <!--Your application view-->
</Grid>

diagonal gradient view

Diagonal Linear Gradient


Apply radial gradient

A radial gradient paints a view with multiple colors that blend together and create a circular color effect. A radial gradient axis is defined by a circle and its color radius starts from its origin. You can set the color radius and origin by using the Radius and Center properties of SfRadialGradientBrush. Refer to this documentation to learn more about radius and center customization.

<gradient:SfGradientView>
      <gradient:SfGradientView.BackgroundBrush>
            <gradient:SfRadialGradientBrush x:Name="linear" Radius="1" Center="0.5,0.5">
                  <gradient:SfRadialGradientBrush.GradientStops>
                        <gradient:SfGradientStop Color="#ff05cd" Offset="0.0" />
                        <gradient:SfGradientStop Color="#313196" Offset="1.0" />
                  </gradient:SfRadialGradientBrush.GradientStops>
             </gradient:SfRadialGradientBrush>
      </gradient:SfGradientView.BackgroundBrush>
</gradient:SfGradientView>
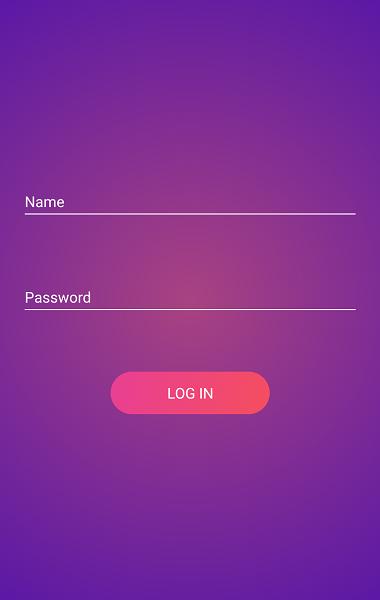
radial gradient view

Circular Gradient

Gradient support for Button and Switch controls

In our 2019 Volume 2 release, we have provided gradient support for the Syncfusion Button and Switch controls to make it easy to apply gradient effects to them.

Button

You can set the gradient background for the Button control using the BackgroundGradient property as shown in the following code.

       
        <!--Linear gradient background-->
        <buttons:SfButton HeightRequest="40" WidthRequest="150" CornerRadius="20" Text="Radial">
            <buttons:SfButton.BackgroundGradient>
                <gradient:SfLinearGradientBrush>
                    <gradient:SfLinearGradientBrush.GradientStops>
                        <gradient:SfGradientStop Color="#51F1F2" Offset="0"/>
                        <gradient:SfGradientStop Color="#2F9BDF" Offset="1"/>
                    </gradient:SfLinearGradientBrush.GradientStops>
                </gradient:SfLinearGradientBrush>
            </buttons:SfButton.BackgroundGradient>
        </buttons:SfButton>
        
        <!--Radial gradient background-->
        <buttons:SfButton HeightRequest="40" WidthRequest="150" CornerRadius="20" Text="Radial">
            <buttons:SfButton.BackgroundGradient>
                <gradient:SfRadialGradientBrush Radius="1">
                    <gradient:SfRadialGradientBrush.GradientStops>
                        <gradient:SfGradientStop Color="#FFB57B" Offset="0"/>
                        <gradient:SfGradientStop Color="#FF5361" Offset="1"/>
                    </gradient:SfRadialGradientBrush.GradientStops>
                </gradient:SfRadialGradientBrush>
            </buttons:SfButton.BackgroundGradient>
        </buttons:SfButton>

Gradient Syncfusion button

Linear (Left) and Radial (Right) Gradients in the Button Control

Switch

You can apply the gradient effect in both the track and thumb of the Switch control by using the TrackGradient and ThumbGradient properties.

     
<buttons:SfSwitch VisualType="Custom">
    <buttons:SfSwitch.SwitchSettings>
          <syncfusion:MaterialSwitchSettings>
                <syncfusion:MaterialSwitchSettings.ThumbGradient>
                    <gradient:SfLinearGradientBrush StartPoint="0.5, 0" EndPoint="0.5, 1">
                          <gradient:SfLinearGradientBrush.GradientStops>
                                <gradient:SfGradientStop Color="#FFFF0199" Offset="0.0" />
                                <gradient:SfGradientStop Color="#FFFFFFFF" Offset="1.0" />
                          </gradient:SfLinearGradientBrush.GradientStops>
                    </gradient:SfLinearGradientBrush>
                </syncfusion:MaterialSwitchSettings.ThumbGradient>
                <syncfusion:MaterialSwitchSettings.TrackGradient>
                    <gradient:SfLinearGradientBrush>
                          <gradient:SfLinearGradientBrush.GradientStops>
                                <gradient:SfGradientStop Color="#55FF0199" Offset="0.0" />
                                <gradient:SfGradientStop Color="#FFFFFFFF" Offset="1.0" />
                          </gradient:SfLinearGradientBrush.GradientStops>
                    </gradient:SfLinearGradientBrush>
                </syncfusion:MaterialSwitchSettings.TrackGradient>
          </syncfusion:MaterialSwitchSettings>
    </buttons:SfSwitch.SwitchSettings>
</buttons:SfSwitch>

Gradient Syncfusion switch control

Switch Control with Linear Gradient

Summary

In app UI design, color is one of the most powerful design factors and it’s an important part of the latest design trends. As a result, gradients are very hot in the current design moment and can give your app a unique style. In this blog post, we walked through the simple way to apply gradients using the Syncfusion Gradient View control and its extended support in the Button and Switch views. In our upcoming releases, we will include this support for other possible Syncfusion controls to provide built-in gradient background support. I hope you will create or modify your app’s UI design with our Gradient View.

I have added the complete sample code in this GitHub repo. You can always download our free evaluation to see all our components in action. Also, explore our samples available in this GitHub repository. You can even evaluate samples we have available on Google Play and Microsoft Store.

If you have any questions or require clarifications, please let us know in the comments section below. You can also contact us through our support forumDirect-Trac, or our feedback portal. As always, we are happy to assist you!

The post How to Make Stylish Gradient Backgrounds in Xamarin.Forms appeared first on Syncfusion Blogs.
Introducing Timeline View in Xamarin.Forms Scheduler

$
0
0

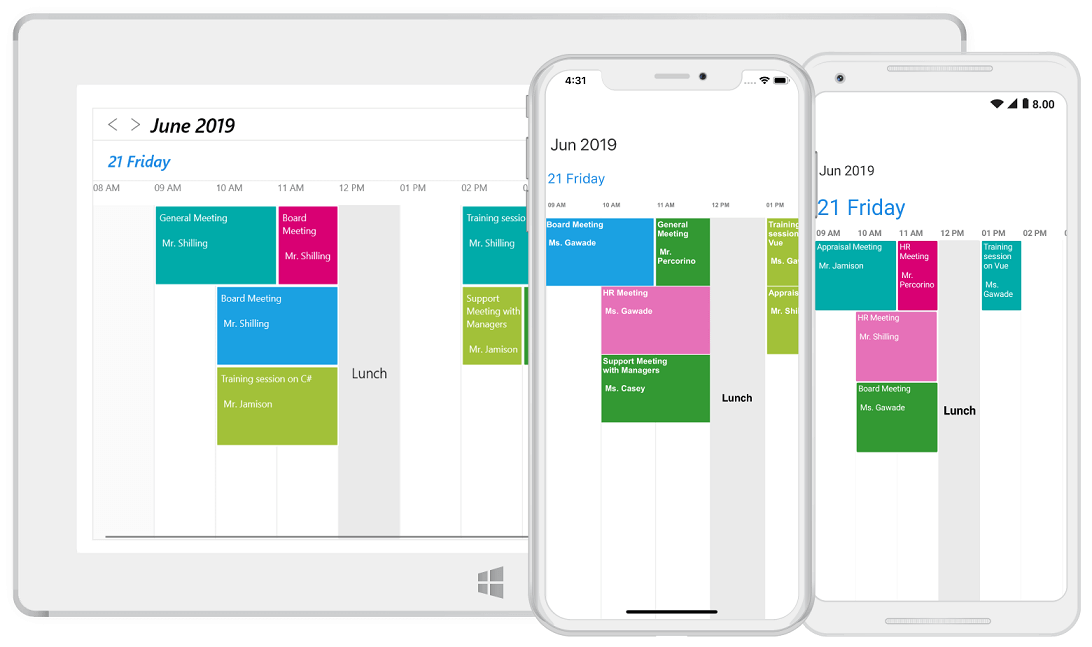
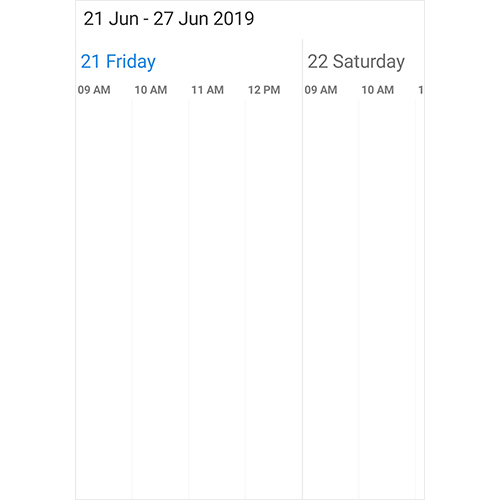
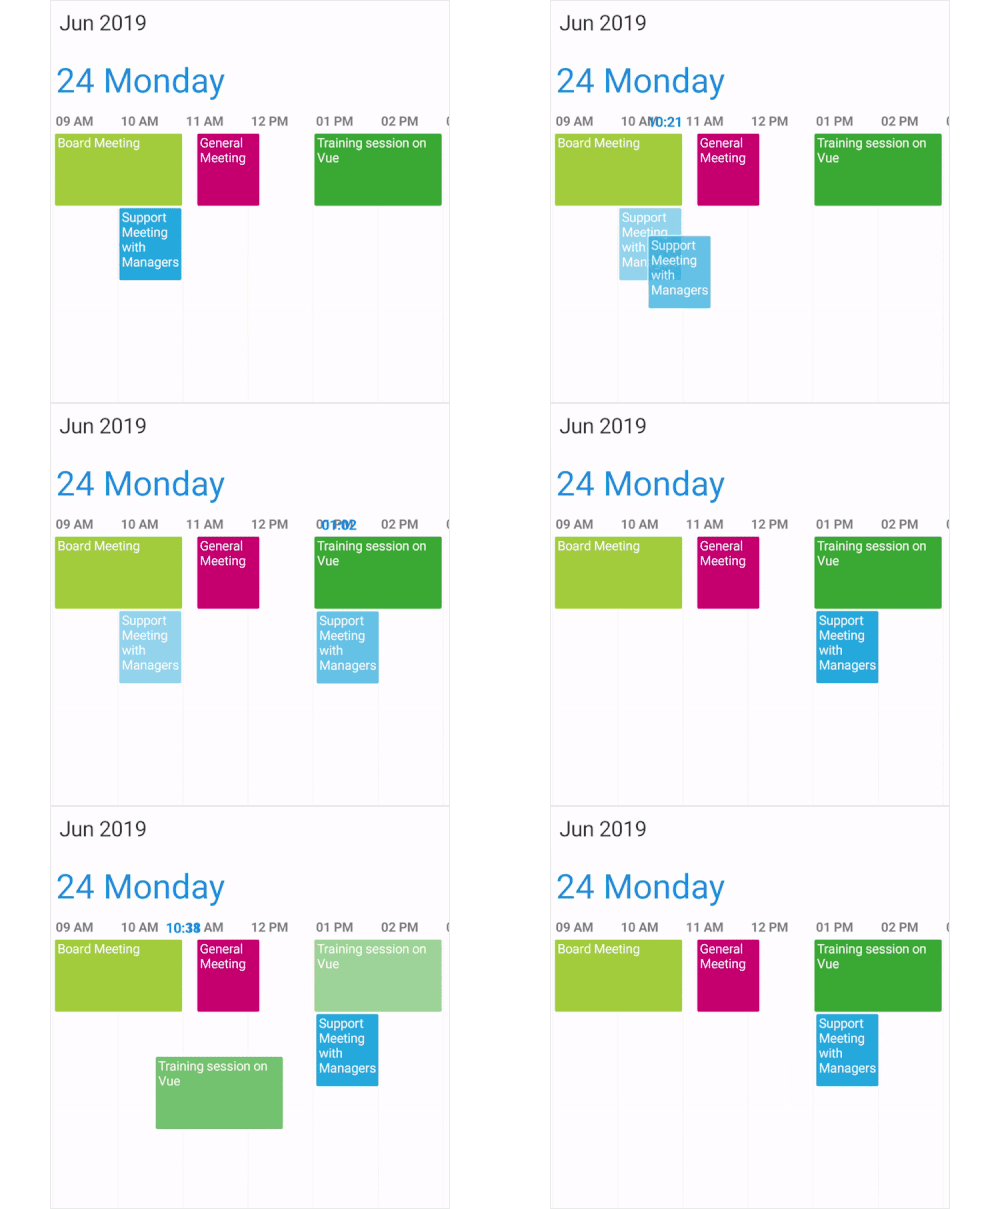
The Xamarin.Forms Scheduler control’s timeline view displays dates in a horizontal time axis with the desired number of days. This feature is available from 2019 volume 2 beta release. It allows users to schedule and manage events precisely. Its rich feature set includes events rescheduling, view customization, special time regions support, navigation, date restrictions, and other features.

In this blog, I will provide a walk-through on key features of the timeline view in Scheduler. If you are new to the Scheduler control, then we recommend you go through its getting started documentation before proceeding further.Timeline View in Xamarin Forms Scheduler

Timeline View in Xamarin Forms Scheduler

Working hours customization

The timeline view allows users to change the start and end times so they can customize their working hours. You can also display a wide range of time durations by setting a double value. This will be converted to minutes as shown in the following code snippet.

<schedule:SfSchedule x:Name="schedule" ScheduleView="TimelineView">
    <schedule:SfSchedule.TimelineViewSettings>
        <!--Setting visible hours properties. -->
        <schedule:TimelineViewSettings
            StartHour="7.5"
            EndHour="18.5">
            <schedule:TimelineViewSettings.LabelSettings>
                <schedule:TimelineLabelSettings TimeFormat="hh:mm" />
             </schedule:TimelineViewSettings.LabelSettings>
        </schedule:TimelineViewSettings>
    </schedule:SfSchedule.TimelineViewSettings>
</schedule:SfSchedule>

Customized working hours

Customized working hours

Support for limiting time slots

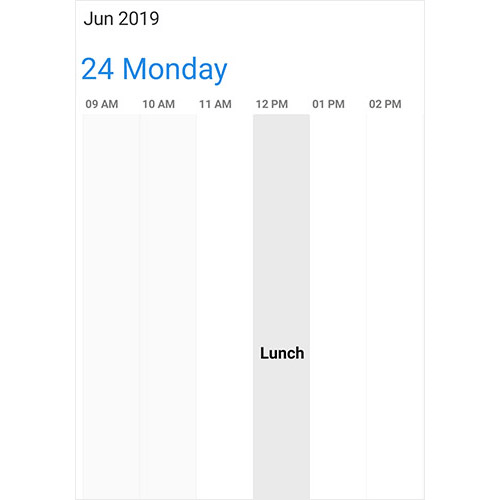
Timeline view allows you to limit the highlighting of a particular region of time for idle and break hours based on application-specific use cases. You can also restrict user interactions, selection, and events creation in the selected region of time. You can add single and multiple special regions of time in the timeline view by using the SpecialTimeRegions property of Scheduler as shown in the following code.

<schedule:SfSchedule x:Name="schedule" ScheduleView="TimelineView">
    <!--Setting special time region properties.-->
    <schedule:SfSchedule.SpecialTimeRegions>
        <schedule:TimeRegionSettings 
            StartHour="13" 
            EndHour="14" 
            Text="Lunch"
            CanEdit="False"
            Color="Black"
            TextColor="White"/>
    </schedule:SfSchedule.SpecialTimeRegions>
</schedule:SfSchedule>

Limiting time slots

Limiting time slots

Nonworking days

Timeline view allows you to skip selective days of a week to remove nonworking days.

public ObservableCollection NonWorkingDays = new ObservableCollection();
this.NonWorkingDays.Add(DayOfWeek.Sunday);
this.NonWorkingDays.Add(DayOfWeek.Saturday);
<syncfusion:SfSchedule
            x:Name="schedule"
            ScheduleView="TimelineView">
       <syncfusion:SfSchedule.TimelineViewSettings>
           <syncfusion:TimelineViewSettings
               NonWorkingsDays="{Binding NonWorkingDays}">
           </syncfusion:TimelineViewSettings>
       </syncfusion:SfSchedule.TimelineViewSettings>
</syncfusion:SfSchedule>

Schedule and manage events

Timeline view allows you to schedule and manage all kinds of events such as all-day, spanning, and recurring events. Each view displays events across the time slots based on their duration within their respective days. By default, all-day events will be rendered on top of time slots, then span events, followed by recurring and normal events.

You can quickly reschedule any event in the timeline view by dragging it from a one-time slot and dropping it in another. It is also possible to restrict the rescheduling of certain appointments and prevent the dropping of an appointment at a certain time.Schedule and manage events

Schedule and manage events

In the timeline view, you can display events with a desired height based on the content to greatly enhance the content’s readability using the AppointmentHeight property.

<schedule:SfSchedule x:Name="schedule" ScheduleView="TimelineView">
    <schedule:SfSchedule.TimelineViewSettings>
        <!--Setting appointment height property.-->
        <schedule:TimelineViewSettings
	        AppointmentHeight="100" />
    </schedule:SfSchedule.TimelineViewSettings>
</schedule:SfSchedule>

If you need to add a large number of events to the same time slot, each event’s height will be adjusted automatically without considering the AppointmentHeight to make all the events visible.

Personalized timeline view

The timeline view is flexible enough that its appearance and format can be customized to provide a uniform and consistent look. You can also expand or condense the time interval and its height based on the application’s size and requirement.

<schedule:SfSchedule x:Name="schedule" 
     ScheduleView="TimelineView"
     TimeInterval="180"   
     TimeIntervalHeight="150">
     <schedule:SfSchedule.TimelineViewSettings>
         <schedule:TimelineViewSettings
	        Color="#fcf3c9"
	        BorderColor="#fceb9f"
	        BorderWidth="5" >
                   <schedule:TimelineViewSettings.LabelSettings>
                        <schedule:TimelineLabelSettings 
                              TimeLabelColor="#8282ff" 
                              TimeLabelSize="15" />
                    </schedule:TimelineViewSettings.LabelSettings>
                </schedule:TimelineViewSettings>

    </schedule:SfSchedule.TimelineViewSettings>
</schedule:SfSchedule>

Personalized Timeline View

Personalized Timeline View

Conclusion

In this blog post, we’ve had a quick overview of the key features of the timeline view that are available form 2019 volume 2 beta release. You can explore other features of this control in the documentation, where you can find detailed explanations of each feature along with code examples. You can also check out our project samples in this GitHub repository. Feel free to try out this sample and share your feedback or questions in the comments section. You can also contact us through our support forumDirect-Trac, or feedback portal. We are happy to assist you.

The post Introducing Timeline View in Xamarin.Forms Scheduler appeared first on Syncfusion Blogs.
How to Convert Image to PDF in ASP.NET Core

$
0
0

Converting images to PDFs is critical in a wide variety of contexts in our day-to-day lives. In order to archive legal, medical, industrial, and academic documents, scanned images are converted into PDF documents. Images are converted to PDF documents and digitally signed to ensure their originality and fidelity. This type of conversion is also used for processing optical character recognition.

The Syncfusion PDF library has extended support to convert images to PDFs for the ASP.NET Core platform. In this blog, I am going to walk you through this feature, covering the following details:

Converting PNG and JPEG images to PDF

To convert PNG and JPEG images to PDF, create and set up an ASP.NET Core project and refer the project to the Syncfusion PDF assemblies on NuGet.

Add the following code in Index.cshtml to select multiple images.

<form method="post" enctype="multipart/form-data" asp-controller="Home" asp-action="ConvertToPDF">
    <div class="form-group">
        <div class="col-md-10">
            <p><h4>Select one or more images:</h4></p>
            <input type="file" name="files" multiple accept="image/*">
        </div>
    </div>
    <div class="form-group">
        <div class="col-md-10">
            <br />
            <input type="submit" value="Convert to PDF">
        </div>
    </div>
</form>

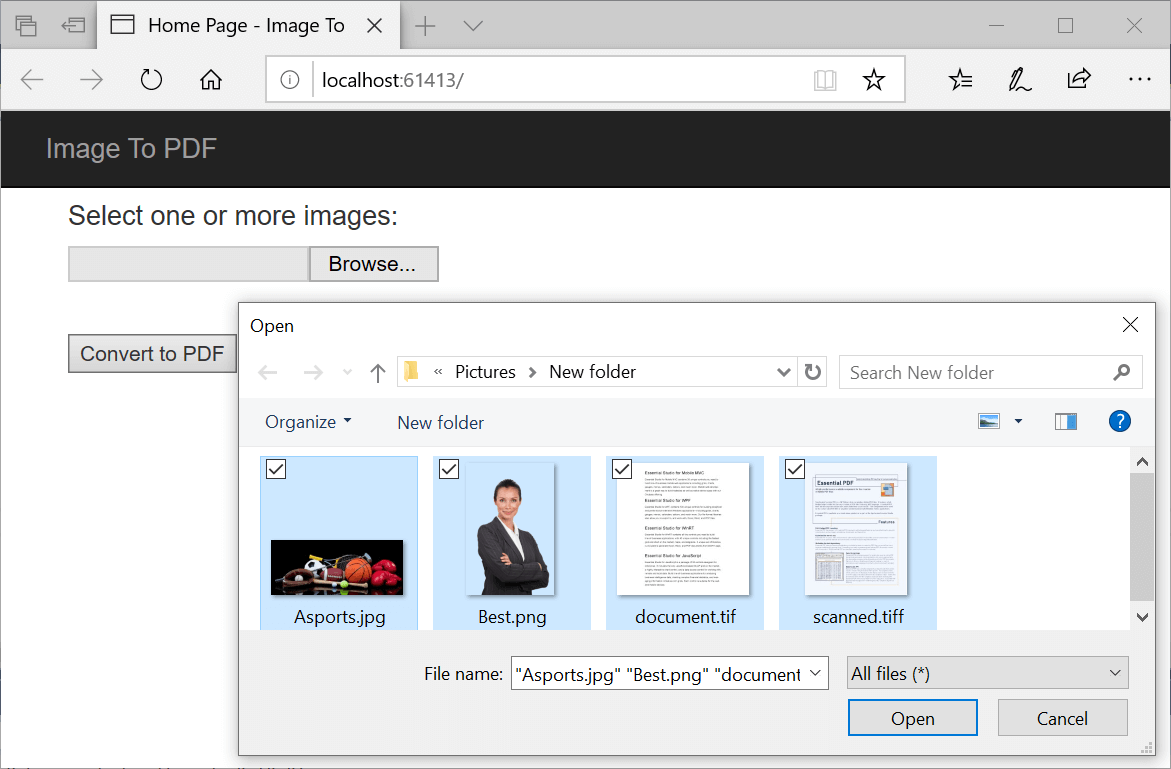
This markup renders in a browser as shown in the following figure.Selecting Images for Conversion

Selecting Images for Conversion

Add a new action method ConvertToPDF in HomeContoller.cs as provided in the following code snippet.

[HttpPost]
public IActionResult ConvertToPDF(IList files)
{
    //Creating the new PDF document
    PdfDocument document = new PdfDocument();

    foreach (var formFile in files)
    {
        if (formFile.Length > 0)
        {
            MemoryStream file = new MemoryStream();
            formFile.CopyTo(file);
            //Loading the image
            PdfImage image = PdfImage.FromStream(file);
            //Adding new page
            PdfPage page = page = document.Pages.Add();

            //Drawing image to the PDF page
            page.Graphics.DrawImage(image, new PointF(0, 0));
            file.Dispose();
        }
    }
    //Saving the PDF to the MemoryStream
    MemoryStream stream = new MemoryStream();

    document.Save(stream);

    //Set the position as '0'.
    stream.Position = 0;

    //Download the PDF document in the browser
    FileStreamResult fileStreamResult = new FileStreamResult(stream, "application/pdf");

    fileStreamResult.FileDownloadName = "ImageToPDF.pdf";

    return fileStreamResult;
}

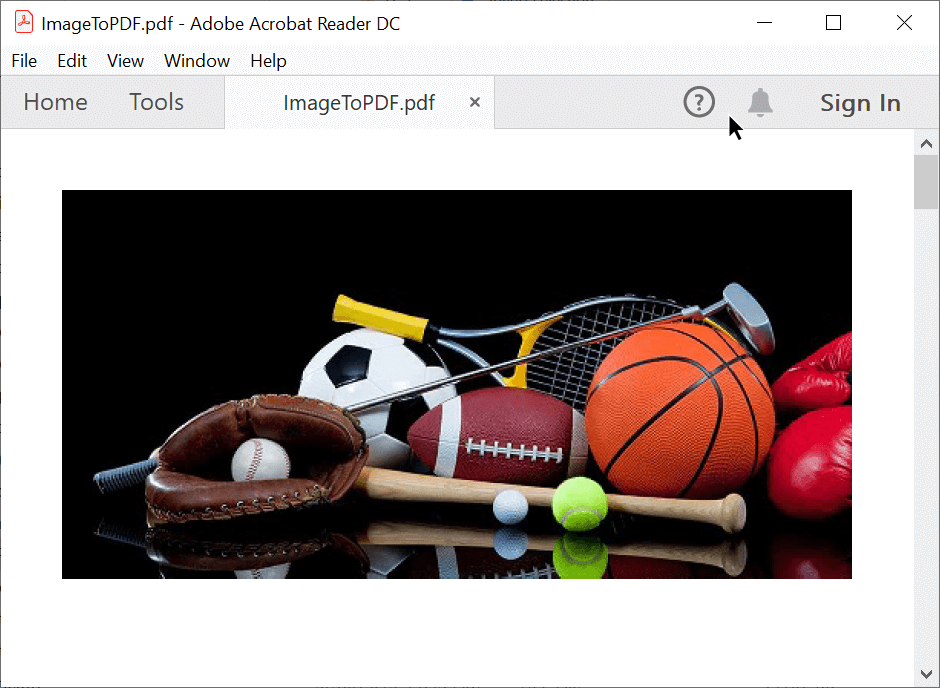
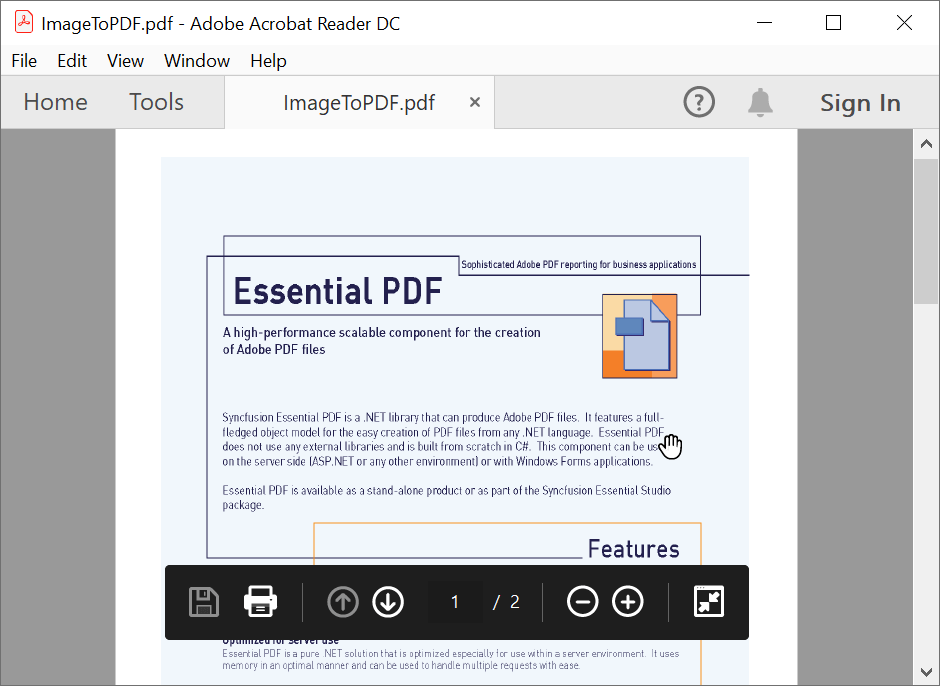
By executing this example, you will get the PDF document shown in the following image.Image Converted to PDF

Image Converted to PDF

Converting multi-frame TIFF images to PDF

TIFF images usually have multiple frames in a single file. To draw each frame in a page of a PDF document, you need to iterate each frame individually.

The following code sample draws a multi-frame TIFF image to a PDF document.

if (formFile.ContentType == "image/tiff")
{
    //Get the image stream and draw frame by frame
    using (var tiffImage = new PdfBitmap(file))
    {
        int frameCount = tiffImage.FrameCount;
        for (int i = 0; i < frameCount; i++)
        {
            //Add pages to the document
            var page = document.Pages.Add();
            //Getting page size to fit the image within the page
            SizeF pageSize = page.GetClientSize();
            //Selecting frame in TIFF
            tiffImage.ActiveFrame = i;
            //Draw TIFF frame
            page.Graphics.DrawImage(tiffImage, 0, 0, pageSize.Width, pageSize.Height);
        }
    }
}

By executing this example, you will get the PDF document shown in the following image.Multi-frame TIFF Image Converted to PDF

Multi-frame TIFF Image Converted to PDF

Changing the PDF page size to match the image size

The default size of a page in a PDF document is A4 (210 × 297 mm). You can set a custom size for a PDF document using the PageSettings property of PdfDocument. Here we are going to set the page size to be the same as the image size.

//Creating the new PDF document
PdfDocument document = new PdfDocument();

//Setting page margin to 0
document.PageSettings.Margins.All = 0;

foreach (var formFile in files)
{
    if (formFile.Length > 0)
    {
        MemoryStream file = new MemoryStream();
        formFile.CopyTo(file);

        //Loading the image
        PdfImage image = PdfImage.FromStream(file);
        //Setting same page size as image
        PdfSection section = document.Sections.Add();
        section.PageSettings.Width = image.PhysicalDimension.Width;
        section.PageSettings.Height = image.PhysicalDimension.Height;
        PdfPage page = section.Pages.Add();

        //Drawing image to the PDF page
        page.Graphics.DrawImage(image, new PointF(0, 0),new SizeF(page.Size.Width,page.Size.Height));

        file.Dispose();
    }
}
//Saving the PDF to the MemoryStream
MemoryStream stream = new MemoryStream();

document.Save(stream);

//Set the position as '0'.
stream.Position = 0;

//Download the PDF document in the browser
FileStreamResult fileStreamResult = new FileStreamResult(stream, "application/pdf");

fileStreamResult.FileDownloadName = "ImageToPDF.pdf";

return fileStreamResult;

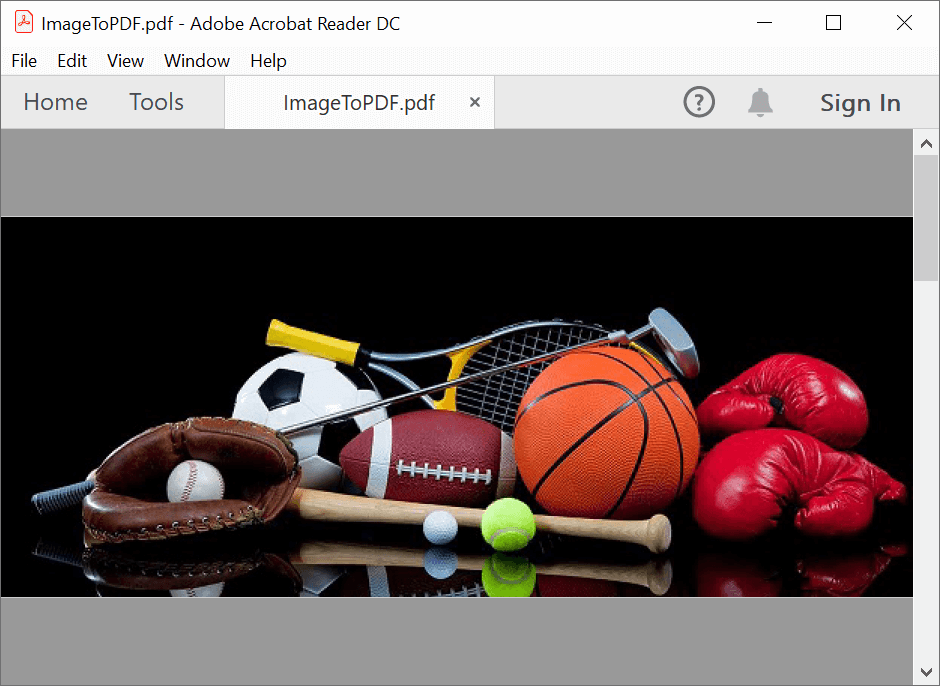
By executing this code, you will get the PDF document shown in the following image.PDF Document Size with Same Size as Original Image

PDF Document Size with Same Size as Original Image

Applying transparency and rotation to images

You can add transparency and rotation to images using the SetTransparency and RotateTransform methods of PdfGraphics.

This is illustrated in the following code example.

//Loading the image
PdfImage image = PdfImage.FromStream(file);
//Adding new page
PdfPage page = page = document.Pages.Add();

//Apply transparency
page.Graphics.SetTransparency(0.5f);

//Rotate the coordinate system
page.Graphics.RotateTransform(-45);
//Drawing image to the PDF page
page.Graphics.DrawImage(image, new PointF(0, 0));

Conclusion

As you can see, the Syncfusion .NET Core PDF library provides an easy way to convert JPEG, PNG, and multi-frame TIFF images to PDF documents. With this, you can provide image-to-PDF conversion as an ASP.NET Core web service or web application.

Please check out the sample in this GitHub repository for a hands-on experience of the image-to-PDF conversion feature. Also, take a moment to peruse the documentation, where you’ll find other options and features, all with accompanying code examples.

If you have any questions or require clarifications about these features, please let us know in the comments section below. You can also contact us through our support forum, Direct-Trac, or Feedback Portal. We are happy to assist you!

The post How to Convert Image to PDF in ASP.NET Core appeared first on Syncfusion Blogs.
Top 10 Features of Syncfusion WPF PDF Viewer

$
0
0

The Syncfusion PDF Viewer for WPF is a feature-rich control that provides great functionalities rather than just displaying PDF documents. It supports bookmarks, hyperlinks, zoom modes, and other features for better navigation and viewing experience. With the rich set of annotations support, reviewing PDF documents is made easier. You can fill PDF Acroforms interactively using PDF Viewer, more details about interactive form filling is available here. In this blog, I am going to walk you through 10 major features of the PDF Viewer control:

Text markup annotations

Text markup annotations help draw attention to a particular piece of text in a document. It can either be an important text to be focused on or some unimportant text to be ignored. The PDF Viewer supports including and deleting three types of text markup annotations:

  • Highlight
  • Underline
  • Strikethrough

Usually, highlight and underline annotations are used to bring attention to text and strikethrough is used to indicate text to be ignored.

You can either jump to the annotation mode and select the text to which to add an annotation or select the text and add the annotation using the context menu.

Text Markup Annotations - PDF Viewer

Text markup annotations—PDF Viewer

Customization of colors and the opacity of individual annotations is also possible. For more information, please refer to the UG documentation.

Shape annotations

Like the text markup annotation, shape annotations are also used to focus attention on a certain region of a document. There is no restriction in adding a shape annotation; it can be added in any part of the PDF document. The shape annotations supported by the PDF Viewer are:

  • Line
  • Rectangle
  • Circle

To include a shape annotation, jump to the annotation mode and drag the mouse over the desired pages of the PDF document.

Shape Annotations - PDF Viewer

Shape annotations—PDF Viewer

Customization of colors and the opacity of individual annotations is also possible. For more information, please refer to the UG documentation.

Text annotation

The text annotation feature allows users to add text content anywhere in the PDF document. Like shape annotation, this, too, does not have any restriction on the inclusion area. It is usually used to make some notes about the content.

Text Annotation - PDF Viewer

Text annotation—PDF Viewer

You can customize the font size and color of this annotation. To learn more about text annotation, please refer to the UG documentation.

Free-hand annotations

The PDF Viewer also allows the inclusion of free-hand drawings and scribbles in a PDF document, and the user is free to draw anything over the page surface. The user can customize the color, opacity, and thickness of the annotation.

To include this annotation, jump to the annotation mode and start to scribble over the page surface.

Free Hand Annotation - PDF Viewer

Free-hand annotation —PDF Viewer

More details about freehand annotation are available here.

Stamp annotations

Adding stamp annotation to a PDF document is similar to adding a rubber stamp to a paper document.  You can choose from a list of predefined stamps and select the place to put it in the document.

Stamp annotation - PDF Viewer

Stamp annotation —PDF Viewer

For more details about managing stamp annotation, please refer to the UG documentation.

Redact document content

There may be some situations in which we have to share a PDF document and don’t want to expose some particular data in it. In these cases, we can redact that particular content of the PDF document and share it confidentially.

Redact PDF content - PDF Viewer

Redact PDF content—PDF Viewer

The redacted content of the PDF document can never be revealed, even by the owner who applied the redaction.

For more details about the redaction feature, refer to the UG documentation.

Rearrange pages

The PDF Viewer allows you to rearrange pages of a PDF document. You can either move a single page to a different destination or move a set of pages to a new location. You do this with the Organize Pages windows in the PDF Viewer. Or, you can do it in code-behind without the interference of the UI.

Rearrange pages - PDF Viewer

Rearrange pages—PDF Viewer

More details about rearranging pages can be found here. Doing it in the code-behind is explained here.

Remove and rotate pages

Rotate and remove an individual page or a group of pages in a PDF document using the PDF Viewer. In the Organize Pages window in the PDF Viewer, the mouse hovering over the thumbnail of the page will result in a context menu for rotating or deleting the page. You can rotate the pages in both clockwise and counterclockwise directions.

Rotate or delete page PDF viewer

Rotate or delete page —PDF Viewer

You can select more than one thumbnail to apply these operations to multiple pages using the toolbar in the Organize Pages window.

Rotate multiple pages - PDF Viewer

Rotate multiple pages—PDF Viewer

Please find its documentation here.

Include handwritten signatures

The PDF Viewer supports including handwritten signatures in the PDF document. You can either jump to the signature mode, draw the signature and include it in the PDF document, or select the signature field in the PDF document to display the signature pad to include the signature.

Handwritten-signature PDF Viewer

Including a handwritten signature—PDF Viewer

Refer to the UG documentation of the PDF Viewer for more details about including handwritten signatures.

Print documents

PDF Viewer supports different types of printing for PDF documents:

  • Silent printing
  • Printing using Print dialog

You can also customize the size and orientation of a document while printing it. You can find more details about printing using PDF Viewer here.

Conclusion

I hope you have a better understanding of the major features supported by the WPF PDF Viewer control. What else do you expect from a PDF viewer? Please share your thoughts in the comments sections. Also, check out the sample project in this GitHub location.

If you’re already a Syncfusion user, you can download the product setup here. Otherwise, you can download a free, 30-day trial here.

If you have any questions or require clarification on these features, please contact us through our support forumDirect-Trac, or Feedback Portal. We are happy to assist you!

The post Top 10 Features of Syncfusion WPF PDF Viewer appeared first on Syncfusion Blogs.
How to Convert Image to PDF in ASP.NET Core

$
0
0

Converting images to PDFs is critical in a wide variety of contexts in our day-to-day lives. In order to archive legal, medical, industrial, and academic documents, scanned images are converted into PDF documents. Images are converted to PDF documents and digitally signed to ensure their originality and fidelity. This type of conversion is also used for processing optical character recognition.

The Syncfusion PDF library has extended support to convert images to PDFs for the ASP.NET Core platform. In this blog, I am going to walk you through this feature, covering the following details:

Converting PNG and JPEG images to PDF

To convert PNG and JPEG images to PDF, create and set up an ASP.NET Core project and refer the project to the Syncfusion PDF assemblies on NuGet.

Add the following code in Index.cshtml to select multiple images.

<form method="post" enctype="multipart/form-data" asp-controller="Home" asp-action="ConvertToPDF">
    <div class="form-group">
        <div class="col-md-10">
            <p><h4>Select one or more images:</h4></p>
            <input type="file" name="files" multiple accept="image/*">
        </div>
    </div>
    <div class="form-group">
        <div class="col-md-10">
            <br />
            <input type="submit" value="Convert to PDF">
        </div>
    </div>
</form>

This markup renders in a browser as shown in the following figure.Selecting Images for Conversion

Selecting Images for Conversion

Add a new action method ConvertToPDF in HomeContoller.cs as provided in the following code snippet.

[HttpPost]
public IActionResult ConvertToPDF(IList files)
{
    //Creating the new PDF document
    PdfDocument document = new PdfDocument();

    foreach (var formFile in files)
    {
        if (formFile.Length > 0)
        {
            MemoryStream file = new MemoryStream();
            formFile.CopyTo(file);
            //Loading the image
            PdfImage image = PdfImage.FromStream(file);
            //Adding new page
            PdfPage page = page = document.Pages.Add();

            //Drawing image to the PDF page
            page.Graphics.DrawImage(image, new PointF(0, 0));
            file.Dispose();
        }
    }
    //Saving the PDF to the MemoryStream
    MemoryStream stream = new MemoryStream();

    document.Save(stream);

    //Set the position as '0'.
    stream.Position = 0;

    //Download the PDF document in the browser
    FileStreamResult fileStreamResult = new FileStreamResult(stream, "application/pdf");

    fileStreamResult.FileDownloadName = "ImageToPDF.pdf";

    return fileStreamResult;
}

By executing this example, you will get the PDF document shown in the following image.Image Converted to PDF

Image Converted to PDF

Converting multi-frame TIFF images to PDF

TIFF images usually have multiple frames in a single file. To draw each frame in a page of a PDF document, you need to iterate each frame individually.

To handle TIFF images, add a reference to Syncfusion.Pdf.Imaging.Net.Core NuGet package in your .NET Core project.

The following code sample draws a multi-frame TIFF image to a PDF document.

if (formFile.ContentType == "image/tiff")
{
    //Get the image stream and draw frame by frame
    PdfTiffImage tiffImage = new PdfTiffImage(file);

    int frameCount = tiffImage.FrameCount;
    for (int i = 0; i < frameCount; i++)
    {
        //Add pages to the document
        var page = document.Pages.Add();
        //Getting page size to fit the image within the page
        SizeF pageSize = page.GetClientSize();
        //Selecting frame in TIFF
        tiffImage.ActiveFrame = i;
        //Draw TIFF frame
        page.Graphics.DrawImage(tiffImage, 0, 0, pageSize.Width, pageSize.Height);
   }
}

By executing this example, you will get the PDF document shown in the following image.Multi-frame TIFF Image Converted to PDF

Multi-frame TIFF Image Converted to PDF

Changing the PDF page size to match the image size

The default size of a page in a PDF document is A4 (210 × 297 mm). You can set a custom size for a PDF document using the PageSettings property of PdfDocument. Here we are going to set the page size to be the same as the image size.

//Creating the new PDF document
PdfDocument document = new PdfDocument();

//Setting page margin to 0
document.PageSettings.Margins.All = 0;

foreach (var formFile in files)
{
    if (formFile.Length > 0)
    {
        MemoryStream file = new MemoryStream();
        formFile.CopyTo(file);

        //Loading the image
        PdfImage image = PdfImage.FromStream(file);
        //Setting same page size as image
        PdfSection section = document.Sections.Add();
        section.PageSettings.Width = image.PhysicalDimension.Width;
        section.PageSettings.Height = image.PhysicalDimension.Height;
        PdfPage page = section.Pages.Add();

        //Drawing image to the PDF page
        page.Graphics.DrawImage(image, new PointF(0, 0),new SizeF(page.Size.Width,page.Size.Height));

        file.Dispose();
    }
}
//Saving the PDF to the MemoryStream
MemoryStream stream = new MemoryStream();

document.Save(stream);

//Set the position as '0'.
stream.Position = 0;

//Download the PDF document in the browser
FileStreamResult fileStreamResult = new FileStreamResult(stream, "application/pdf");

fileStreamResult.FileDownloadName = "ImageToPDF.pdf";

return fileStreamResult;

By executing this code, you will get the PDF document shown in the following image.PDF Document Size with Same Size as Original Image

PDF Document Size with Same Size as Original Image

Applying transparency and rotation to images

You can add transparency and rotation to images using the SetTransparency and RotateTransform methods of PdfGraphics.

This is illustrated in the following code example.

//Loading the image
PdfImage image = PdfImage.FromStream(file);
//Adding new page
PdfPage page = page = document.Pages.Add();

//Apply transparency
page.Graphics.SetTransparency(0.5f);

//Rotate the coordinate system
page.Graphics.RotateTransform(-45);
//Drawing image to the PDF page
page.Graphics.DrawImage(image, new PointF(0, 0));

Conclusion

As you can see, the Syncfusion .NET Core PDF library provides an easy way to convert JPEG, PNG, and multi-frame TIFF images to PDF documents. With this, you can provide image-to-PDF conversion as an ASP.NET Core web service or web application.

Please check out the sample in this GitHub repository for a hands-on experience of the image-to-PDF conversion feature. Also, take a moment to peruse the documentation, where you’ll find other options and features, all with accompanying code examples.

If you have any questions or require clarifications about these features, please let us know in the comments section below. You can also contact us through our support forum, Direct-Trac, or Feedback Portal. We are happy to assist you!

The post How to Convert Image to PDF in ASP.NET Core appeared first on Syncfusion Blogs.
Sneak Peek at the new Essential UI Kit for Xamarin.Forms

$
0
0

If you are looking for ways to reduce the time you spent on developing sophisticated UIs in Xamarin.Forms, there is some good news for you – we are planning to release a major update to our Xamain.Forms UI kit soon. While we are still working on providing the finishing touches to the product, we would like to share a quick overview of what will be included in the upcoming release.

We had shipped four reusable login screens in the first release of the UI kit but we got some great feedback from the community to include a lot more screens. This has motivated us to add more than 35 screens across several categories like articles, onboarding, chat, ecommerce, and much more.

Here is just a small sample of the screens that you can expect to see in the release that is scheduled for next week.ECommerce page in UI Kit

Ecommerce

Article page in UI KitArticle

Chat page in UI KitChat

About Us page in UI KitAbout Us

Feedback page in UI KitFeedback

Error page in UI KitError

For all three platforms—Android, iOS, and UWP—each screen was carefully tested, and the layouts were optimized to deliver the greatest possible performance.

Keep reading to find out what other incredible features are going to be included in Essential UI Kit in this release.

Easier integration

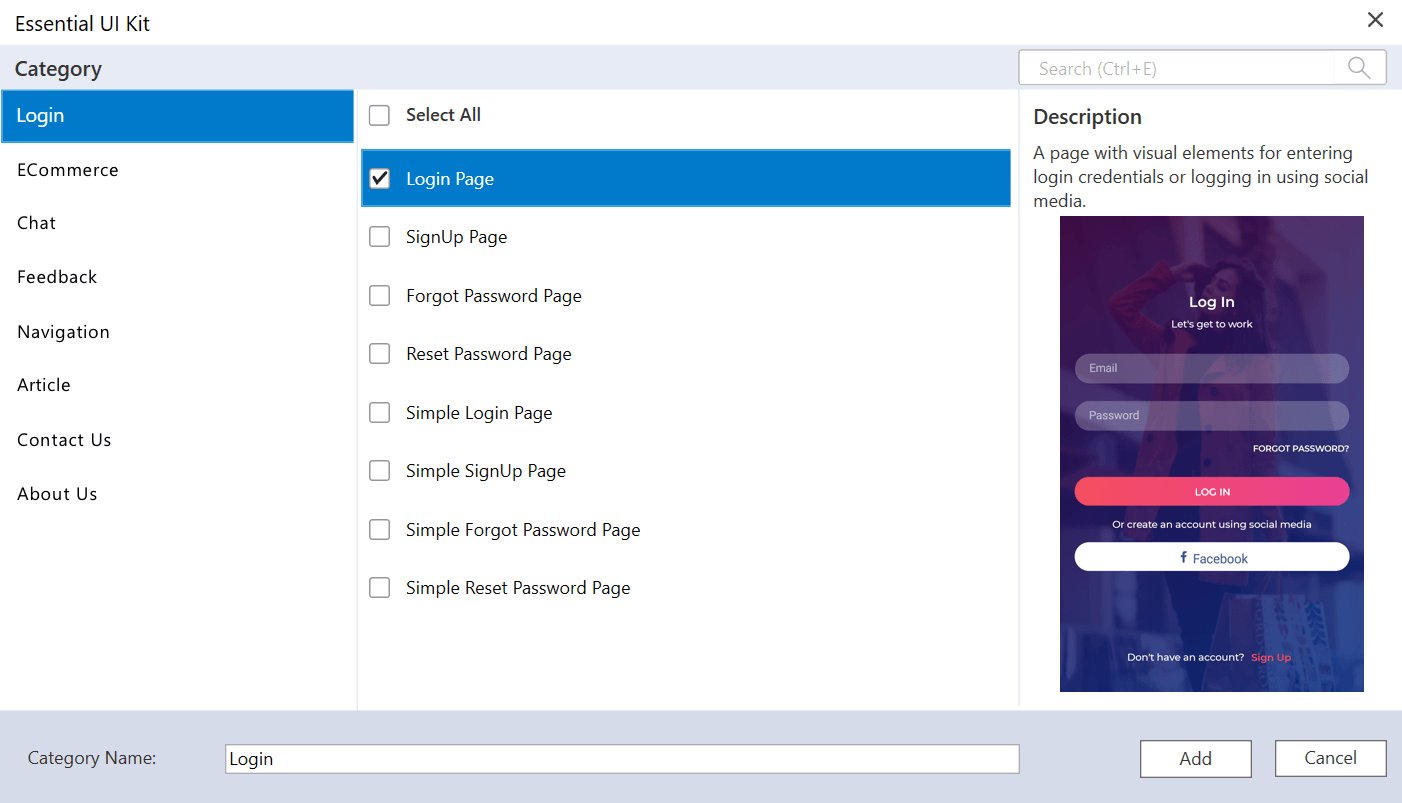
This release will include the Visual Studio item template with the default Add New item dialog. If you feel that adding more than one screen, or all screens in a category, at a time is too hard, then this feature is for you.Add New Item Dialog

Add New Item Dialog

We strongly believe being able to add a screen whenever you need to is as important as the quality of the screen. This Visual Studio extension is specially designed for adding the screens you want. You can choose all the screens from a category, only a few screens from a single category, or screens from multiple categories.

Demos and source

The complete source code for Essential UI Kit for Xamarin.Forms will be published in GitHub by next week. We will also publish a demo app in Play Store to make it easier for you to review all the screens. Once it is publicly available, look at it, explore it and use it in your application.

Conclusion

As stated, this release will include more than 35 templates so that you can build a UI for any common mobile app scenario. If the screen you need isn’t in the kit, don’t worry, it will be added soon. Just tell us what you want via our feedback portal.

Stay tuned to our official Twitter, Facebook and LinkedIn pages for the announcement of the release.

If you found this post useful or have questions, please let us know by posting a comment.

The post Sneak Peek at the new Essential UI Kit for Xamarin.Forms appeared first on Syncfusion Blogs.
Syncfusion 2019 Essential Studio Volume 2 is here!

$
0
0

Syncfusion is happy to announce that Essential Studio 2019 Volume 2 is available for download. We believe this release, packed with new controls and features, will make developers jump high in the air, as we have hand-picked all the enhancements from their feedback.

Let’s glance at everything that has been added to each platform.

Xamarin Mobile

  • Ease your mobile app development with the all-new Switch and StepProgressBar controls.
  • The Charts control is enhanced with WPF support in Xamarin.Forms.
  • In the DataGrid, add multilevel headers with stacked-header support and span them across columns.
  • In the Scheduler control, effectively view and focus appointments for an individual or group with timeline and resource view support.
  • Also in the Scheduler control, easily navigate across decades and centuries using the century and decade views.
  • Develop applications with accessibility support in PDF Viewer.
  • Also in PDF Viewer, add custom stamps to PDF documents with custom stamp support.
  • Text input layout support was added for the Autocomplete, ComboBox, and DataForm controls.

FileFormats: PDF, Word, Excel, PowerPoint

  • Add comments, reply to them, and set their review status with new features in our PDF library.
  • You can now convert single-frame and multi-frame TIFFs to PDFs in ASP.NET Core using our PDF library.
  • Easily create Excel files by importing data from SQL Server through an Excel data connection using our Excel library.
  • Create better visualizations in a spreadsheet with area and line charts using drop-line support in our Excel library.
  • Now execute mail-merge using ADO.NET objects in the ASP.NET Core and Xamarin platforms by using our Word library.
  • Create group shapes in a Word document and preserve them in Word-to-PDF conversion.
  • Protect PowerPoint presentations by enabling write-protection with our PowerPoint library.

Essential JS 2 Web

  • Syncfusion Blazor components now support the following features to provide native experience in developing Blazor applications.
    • Two-way data binding
    • Template rendering
    • Localization
    • Right-To-Left
    • Form Validation support for Syncfusion Blazor input components
  • Edit Blazor Data Grid with CRUD support.
  • Generate 1-D, QR, and Data Matrix bar codes in web applications with the new Barcode Generator.
  • File Manager now supports file system service providers such as SQL Server database, Microsoft Azure cloud storage, Node.js, and Google Drive cloud storage.
  • Load large data instantly and provide a seamless vertical scrolling experience with virtual scrolling support in the TreeGrid control.
  • New canvas rendering support in the Charts control improves rendering performance.
  • Restrict editing in a particular region of a document in the Word Processor.

WinForms Desktop Applications

  • Easily match your application with the high-contrast black theme of Windows 10 using Theme Studio.

Conclusion

The list of features added in Volume 2 doesn’t stop here. We leave the rest for you to explore in the release notes and What’s New sections of our website.

Be sure to try these features in the Essential Studio 2019 volume 2 release and give us your feedback by commenting on this blog post or by using our support forum, Direct-Trac, or feedback portal.

The post Syncfusion 2019 Essential Studio Volume 2 is here! appeared first on Syncfusion Blogs.
Introducing Resource View in Xamarin Forms Scheduler

$
0
0

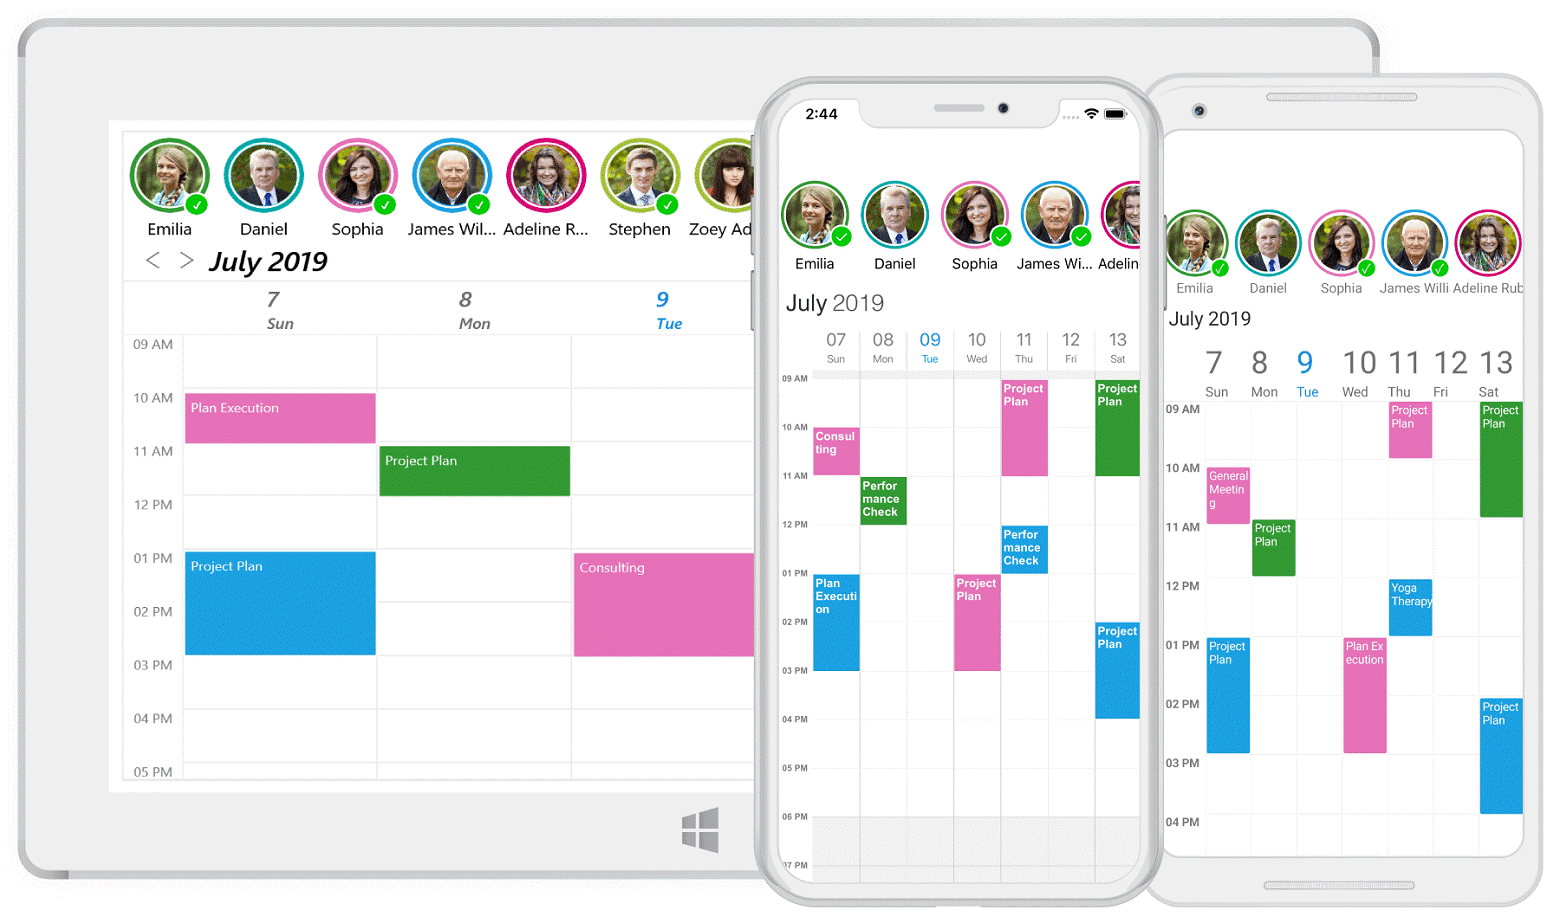
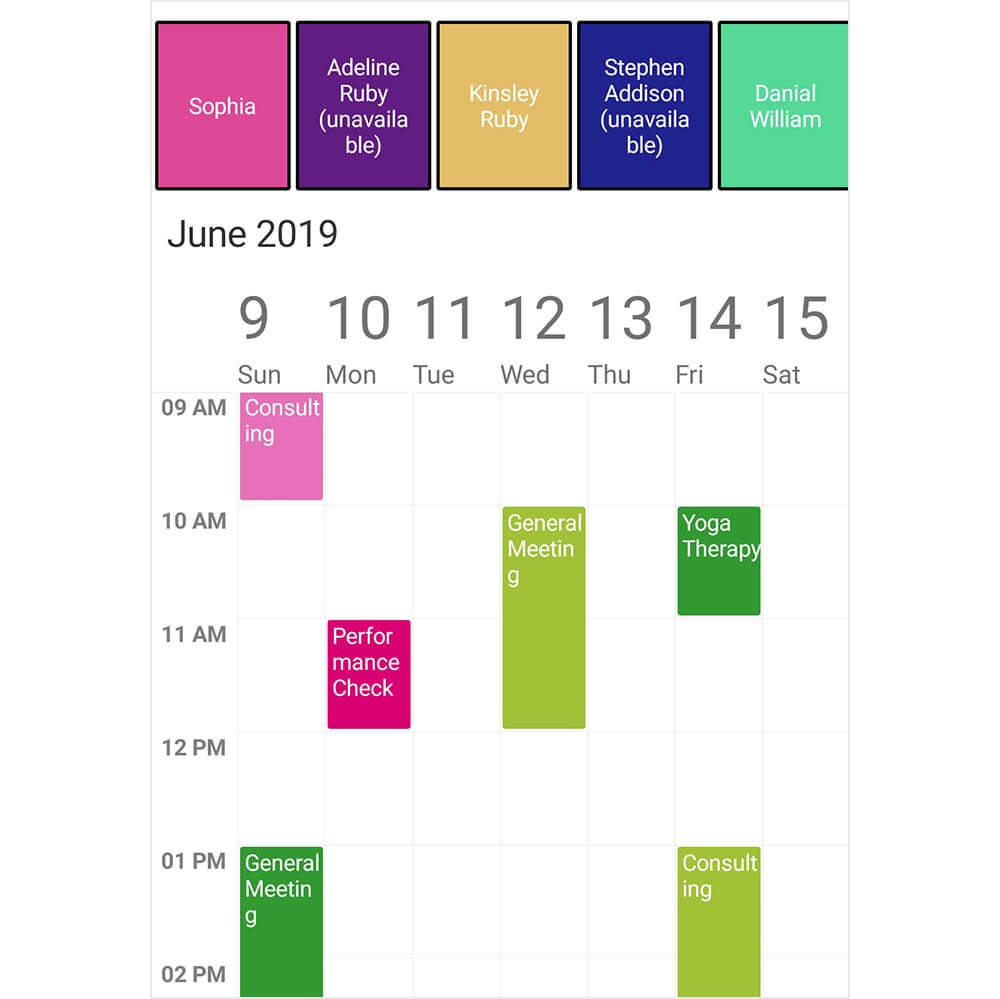
The Xamarin.Forms resource view is a discrete view integrated into our Scheduler control to display events in all types of schedule views. This feature became available in our 2019 Volume 2 release. Through this feature, you can select single or multiple resources to view their events. You can also assign a unique color to each resource to easily identify its associated appointment. This rich feature set includes data binding, customization, globalization, and localization.

In this blog post, I will explain the key features of the multiple resource view in the Scheduler control. If you are new to the Scheduler control, please read the Getting Started article in the Scheduler documentation before proceeding.Scheduler Resource View in a Xamarin.Forms Application

Scheduler Resource View in a Xamarin.Forms Application

Data binding

The resource view is an MVVM-friendly feature with complete data-binding support. This allows you to bind data from services and databases in order to add resources in the Scheduler control. You can bind custom resource data to the scheduler using a mapping technique.

The following code listing shows how to create a custom resource.

    /// <summary>   
    /// Represents custom data properties.   
    /// </summary> 
    public class Employee
    {
        public string Name { get; set; }
        public object Id { get; set; }
        public Color Color { get; set; }
        public string DisplayPicture { get; set; }
    }

This is how you map a custom resource to the Scheduler control.

 <syncfusion:SfSchedule ScheduleView="WeekView" ShowResourceView="True">
            <syncfusion:SfSchedule.ResourceMapping>
                <syncfusion:ResourceMapping Name="Name"
                                          Id="Id"
                                          Color="Color"
                                          Image="DisplayPicture"/>
            </syncfusion:SfSchedule.ResourceMapping>        
 </syncfusion :SfSchedule>
public ObservableCollection<object> Employees { get; set; }
….
// Creating instance for collection of custom resources
Employees = new ObservableCollection<object>();

// Creating instance for custom appointment class
Employee employee = new Employee();

employee.Name = "Kinsley Elena";
employee.Id = 5601;
employee.Color = Color.FromHex("#FFE671B8");
employee.DisplayPicture = "KinsleyElena.png";

// Adding a custom resource in custom resource collection
Employees.Add(employee);

And this is how you bind a custom resource to the Scheduler control.

<syncfusion:SfSchedule x:Name="schedule"
                               ScheduleView="WeekView"
                               ShowResourceView="true"
                               ScheduleResources="{Binding Employees}"/>

Filtering appointments based on resource selection

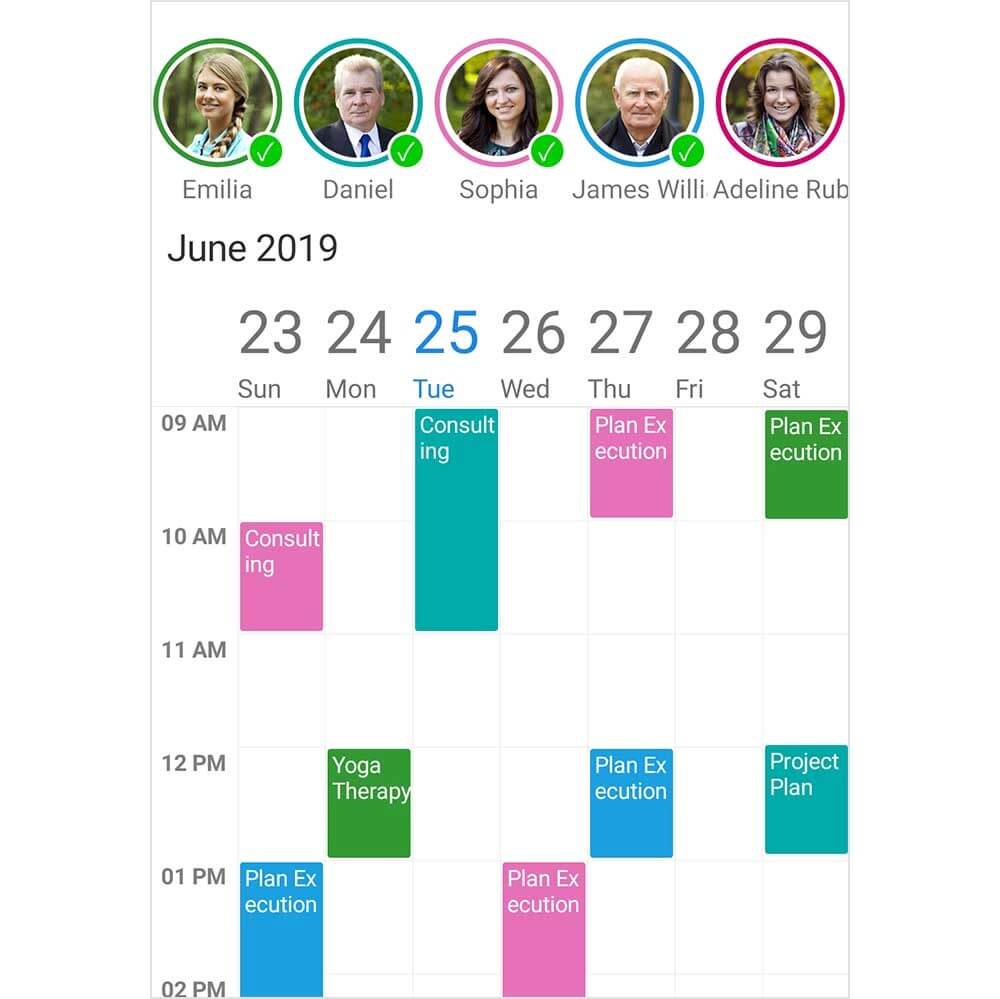
You can enable multiple resources by setting the value Multiple to SelectionMode. The SelectionMode property is available in ResourceViewSettings of the Schedule control instance.

This supports single and multiple selections by tapping resources and filtered appointments associated with a resource. In addition, the multiple resource view provides a single deselect mode, which lets you deselect a selected resource by tapping it again.

        <syncfusion:SfSchedule ScheduleView="WeekView" ShowResourceView="True">
            <syncfusion:SfSchedule.ResourceViewSettings>
                <syncfusion:ResourceViewSettings SelectionMode="Multiple"/>
            </syncfusion:SfSchedule.ResourceViewSettings>
        </syncfusion:SfSchedule>

You can also programmatically select resources.

// Creating instance for collection of selected resources
ObservableCollection<object> selectedEmployees = new ObservableCollection<object>();

//Adding selected resource in resource collection from the resources
selectedEmployees.Add(resources.FirstOrDefault(resource => (resource as ScheduleResource).Id.ToString() == "5601"));
selectedEmployees.Add(resources.FirstOrDefault(resource => (resource as ScheduleResource).Id.ToString() == "5604"));

//Adding selected resource collection to selected resources of SfSchedule
schedule.SelectedResources = selectedEmployees;

And you can programmatically deselect resources.

var selectedEmployee = selectedEmployees.FirstOrDefault(resource => (resource as ScheduleResource).Id.ToString() == "5604");

//Removing selected resource in selected resources of SfSchedule
schedule.SelectedResources.Remove(selectedEmployee);

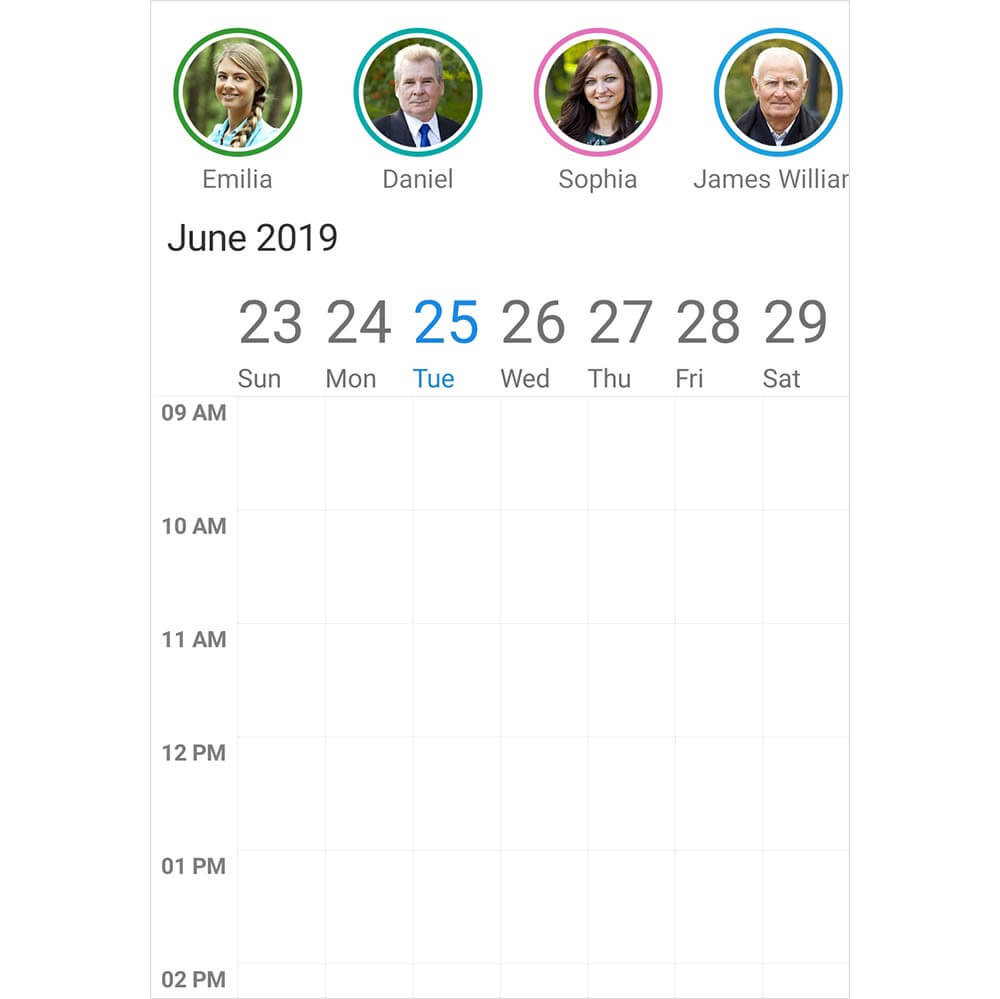
Appointments Filtered Based on Resource Selection

Appointments Filtered Based on Resource Selection

Date-based resources

You can dynamically change a collection of resources for each day, week, or month based on application-specific use-cases that efficiently and effectively utilize the resources. It is even possible to dynamically change the appearance of each resource name, color, and image.

     this.schedule.VisibleDatesChangedEvent += OnVisibleDatesChangedEvent;
        …
        private void OnVisibleDatesChangedEvent(object sender, VisibleDatesChangedEventArgs e)
        {
            var currentMonth = e.visibleDates[e.visibleDates.Count / 2].Month;
            var intern = schedule.ScheduleResources.FirstOrDefault(emp => (emp as Employee).Id.ToString() == "8600");
            if (currentMonth == 2 || currentMonth == 7)
            {
                if (intern != null)
                    return;

                Employee employee = new Employee();
                employee.Name = "Sophiya";
                employee.Id = "8600";
                employee.Color = Color.FromHex("#FFE671B8");
                employee.DisplayPicture = "schedule-resource-4.png";

                schedule.ScheduleResources.Add(employee);
            }
            else
            {
                if (intern == null)
                    return;

                schedule.ScheduleResources.Remove(intern);
            }
        }

You can also easily filter and manage unallocated events for resources by using a dummy resource.

            // Adding dummy resource for unallocated events
            Employee employee = new Employee();

            employee.Name = "Unallocated";
            employee.Id = 4731;
            employee.Color = Color.FromHex("#FFE671B8");
            employee.DisplayPicture = "schedule-unallocated-resource.png";

            // Adding a custom resource in custom resource collection
            Employees.Add(employee);

Visible resource count

You can display only a certain number of resources in the viewable area based on the requirements and size of the application. By default, the resource count will be adjusted based on the size of the resource layout.

        <syncfusion:SfSchedule ScheduleView="WeekView" ShowResourceView="True">
            <syncfusion:SfSchedule.ResourceViewSettings>
                <syncfusion:ResourceViewSettings>
                    <syncfusion:ResourceViewSettings.VisibleResourceCount>
                        <OnPlatform x:TypeArguments="x:Int32"
                                    iOS="5"
                                    Android="4" 
                                    WinPhone="10" />
                    </syncfusion:ResourceViewSettings.VisibleResourceCount>
                </syncfusion:ResourceViewSettings>
            </syncfusion:SfSchedule.ResourceViewSettings>
        </syncfusion:SfSchedule>

Display of Resources in the Viewable Area

Display of Resources in the Viewable Area

View customization

By using data templates, the multiple resource view can host any view or control to customize resource items.  To provide a consistent look, you can also customize each item through the dynamic selection of the UI using a data-template selector.

You can use different templates to differentiate available and unavailable resources in an organization.

    <ContentPage.Resources>
        <ResourceDictionary>
            <local:ResourceTemplateSelector x:Key="resourceDataTemplateSelector"/>
        </ResourceDictionary>
    </ContentPage.Resources>
        <syncfusion:SfSchedule x:Name="schedule" 
                             ScheduleView="WeekView" 
                             ShowResourceView="True"                                      
                  ResourceItemTemplate="{StaticResource resourceDataTemplateSelector}"/>

This is how you create DataTemplateSelector.

public class ResourceTemplateSelector : DataTemplateSelector
    {
        public DataTemplate AvailableResourceTemplate { get; set; }
        public DataTemplate UnavailableResourceTemplate { get; set; }

        public ResourceTemplateSelector()
        {
            AvailableResourceTemplate = new DataTemplate(typeof(AvailableResourceTemplate));
            UnavailableResourceTemplate = new DataTemplate(typeof(UnavailableResourceTemplate));
        }

        protected override DataTemplate OnSelectTemplate(object item, BindableObject container)
        {
            if ((item as Employee).IsAvailable)
                return AvailableResourceTemplate;
            else
                return UnavailableResourceTemplate;
        }
    }

This is how you use a button to display the resources.

<?xml version="1.0" encoding="utf-8" ?>
<Button xmlns="http://xamarin.com/schemas/2014/forms"
        xmlns:x="http://schemas.microsoft.com/winfx/2009/xaml"
        x:Class="TemplatedResourceView.AvailableResourceTemplate"
        Text="{Binding Name}" 
        InputTransparent="true"
        TextColor="White"
        BackgroundColor="{Binding Color}"
        FontSize="10"
        BorderColor="Black"
        BorderWidth="2">
</Button>    
.......

<?xml version="1.0" encoding="utf-8" ?>
<Button xmlns="http://xamarin.com/schemas/2014/forms"
        xmlns:x="http://schemas.microsoft.com/winfx/2009/xaml"
        x:Class="TemplatedResourceView.UnavailableResourceTemplate"
        Text="{Binding Name, StringFormat= '\{0\}  (unavaiable)'}}" 
        InputTransparent="true"
        TextColor="White"
        BackgroundColor="{Binding Color}"
        FontSize="10"
        BorderColor="Black"
        BorderWidth="2">
</Button>

Customized Multiple Resource View

Customized Multiple Resource View

Conclusion

In this blog post, we had a quick overview of the resource view’s key features introduced in Essential Studio 2019, Volume 2 release. You can explore other features in the Scheduler control’s documentation, where you can find detailed explanations of each feature with code examples.

Please feel free to try out the samples available in our GitHub location, and share your feedback or ask questions in the comments section. You can also contact us through our support forumDirect-Trac, or feedback portal. We are happy to assist you.

The post Introducing Resource View in Xamarin Forms Scheduler appeared first on Syncfusion Blogs.


What’s New in 2019 Volume 2: TabbedForm in WinForms

$
0
0

The 2019 Volume 2 release introduces exciting and cool new features for the WinForms TabbedForm control. In this blog, we are going to check out some of them that shipped with the 2019 Volume 2 release. They are:

  • Tab navigation
  • Tab reordering
  • Context menu
  • Right-to-left direction

Tab navigation

The WinForms TabbedForm now includes support to navigate through tabs with simple, intuitive buttons. Using the extensible navigation modes, simple buttons can be loaded. These buttons can be customized and styled based on the intended users.Navigation between Tabs Using Simple Buttons

Navigation between Tabs Using Simple Buttons

Tab reordering

Reordering the tabs is now possible by dragging and dropping them. You can move an active tab to the left or right by dragging the tab header using the mouse pointer.Reordering Tabs in the TabbedForm

Reordering Tabs in the TabbedForm

Context menu

The WinForms TabbedForm now includes options to show menu items that appear when users right-click on the header of a tab. A browser-like context menu appearance can be provided using the extensible customization options. The context menu’s behavior and items can be customized for each tab.Context Menu in a Tab Header

Context Menu in a Tab Header

Right-to-left direction

The WinForms TabbedForm now supports right-to-left (RTL) arrangement for users working in right-to-left language settings such as Hebrew, Arabic, or Persian.Right-to-Left Tabs

Right-to-Left Tabs

Conclusion

In addition to these features, we have included other minor improvements and bug fixes that are published in our release notes. Download our 2019 Volume 2 release of Essential Studio and try our sample from this GitHub location.

Please post your comments below if you have any questions or feedback. You can also contact us through our support forumDirect-Trac, or feedback portal. We are happy to offer any help we can.

The post What’s New in 2019 Volume 2: TabbedForm in WinForms appeared first on Syncfusion Blogs.

What’s New in 2019 Volume 2: Essential JS 2 Tree Grid

$
0
0

I’m so glad to announce that our latest release, 2019 Volume 2, was rolled out last week, packed with all the most anticipated features of our JavaScript Tree Grid. Plus, the component has moved to its final version in this release.

In this blog, I will summarize the Tree Grid features newly shipped in this release. These features are also available on the Angular, React, Vue, ASP.NET MVC , ASP.NET Core, and Blazor platforms.

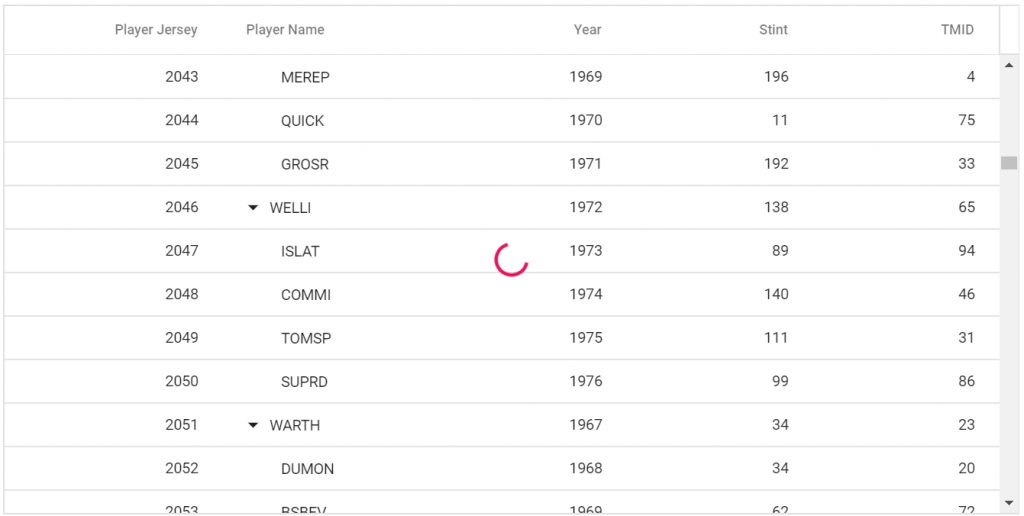
Virtual scrolling

To achieve better performance in the Tree Grid when loading a large set of records, we have provided support for virtual scrolling to only load and render rows in the content viewport instantly as you scroll vertically. For details to use this feature, check our UG documentation.

Tree Grid with Virtual Scrolling

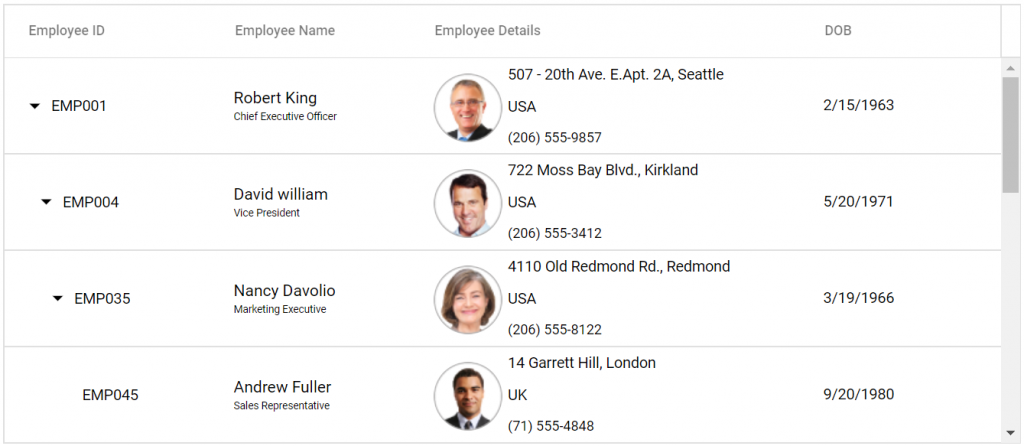
Row template

Everyone has unique requirements for displaying more details in a customized way in a single row. For these, we have implemented the row template feature to customize the entire look and behavior of the Tree Grid rows based on what suits your application.

Tree Grid with Custom Row Template

With this support, you can now define how individual rows display more details with limited columns. For details to use this feature, check our UG documentation.

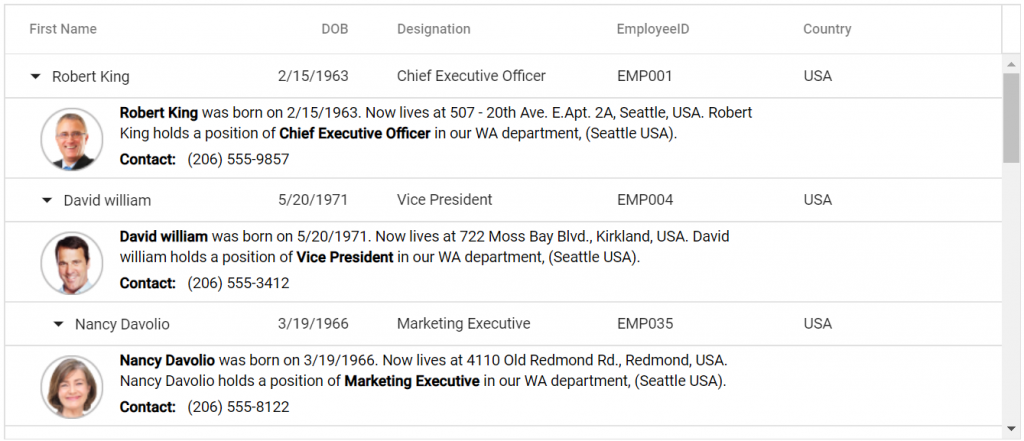
Detail template

To show additional information or detailed views about each row of the Tree Grid, we have implemented detail template feature to render a detail row that is present below each row in a Tree Grid for showing additional information about the corresponding row.

Tree Grid with Detail Template

With this support, you can now define a detail row and its appearance based on your needs using customizable template options. For details to use this feature, check our UG documentation.

Conclusion

In addition to these features, we have included some minor improvements and bug fixes. For existing customers, the new version is available for download from the License and Downloads page. If you are not yet our customer, you can try our 30-day free trial to check out these new features. Try our samples from this GitHub location.

Also, if you wish to send us feedback or would like to submit any questions, please feel free to post them in the comments section below, or contact us through our support forumDirect-Trac or feedback portal.

Want to learn more? Check out these free resources:

The post What’s New in 2019 Volume 2: Essential JS 2 Tree Grid appeared first on Syncfusion Blogs.

Introducing Step Progress Bar for Xamarin.Forms

$
0
0

We are happy to introduce the Xamarin.Forms StepProgressBar component in Essential Studio for Xamarin.Forms 2019, Vol.2.

Most mobile applications have tasks or operations that involve multiple steps or stages that need to be conveyed through a user interface. That’s why Syncfusion created a Step Progress Bar component for Xamarin with dashing visuals and hassle-free usability.

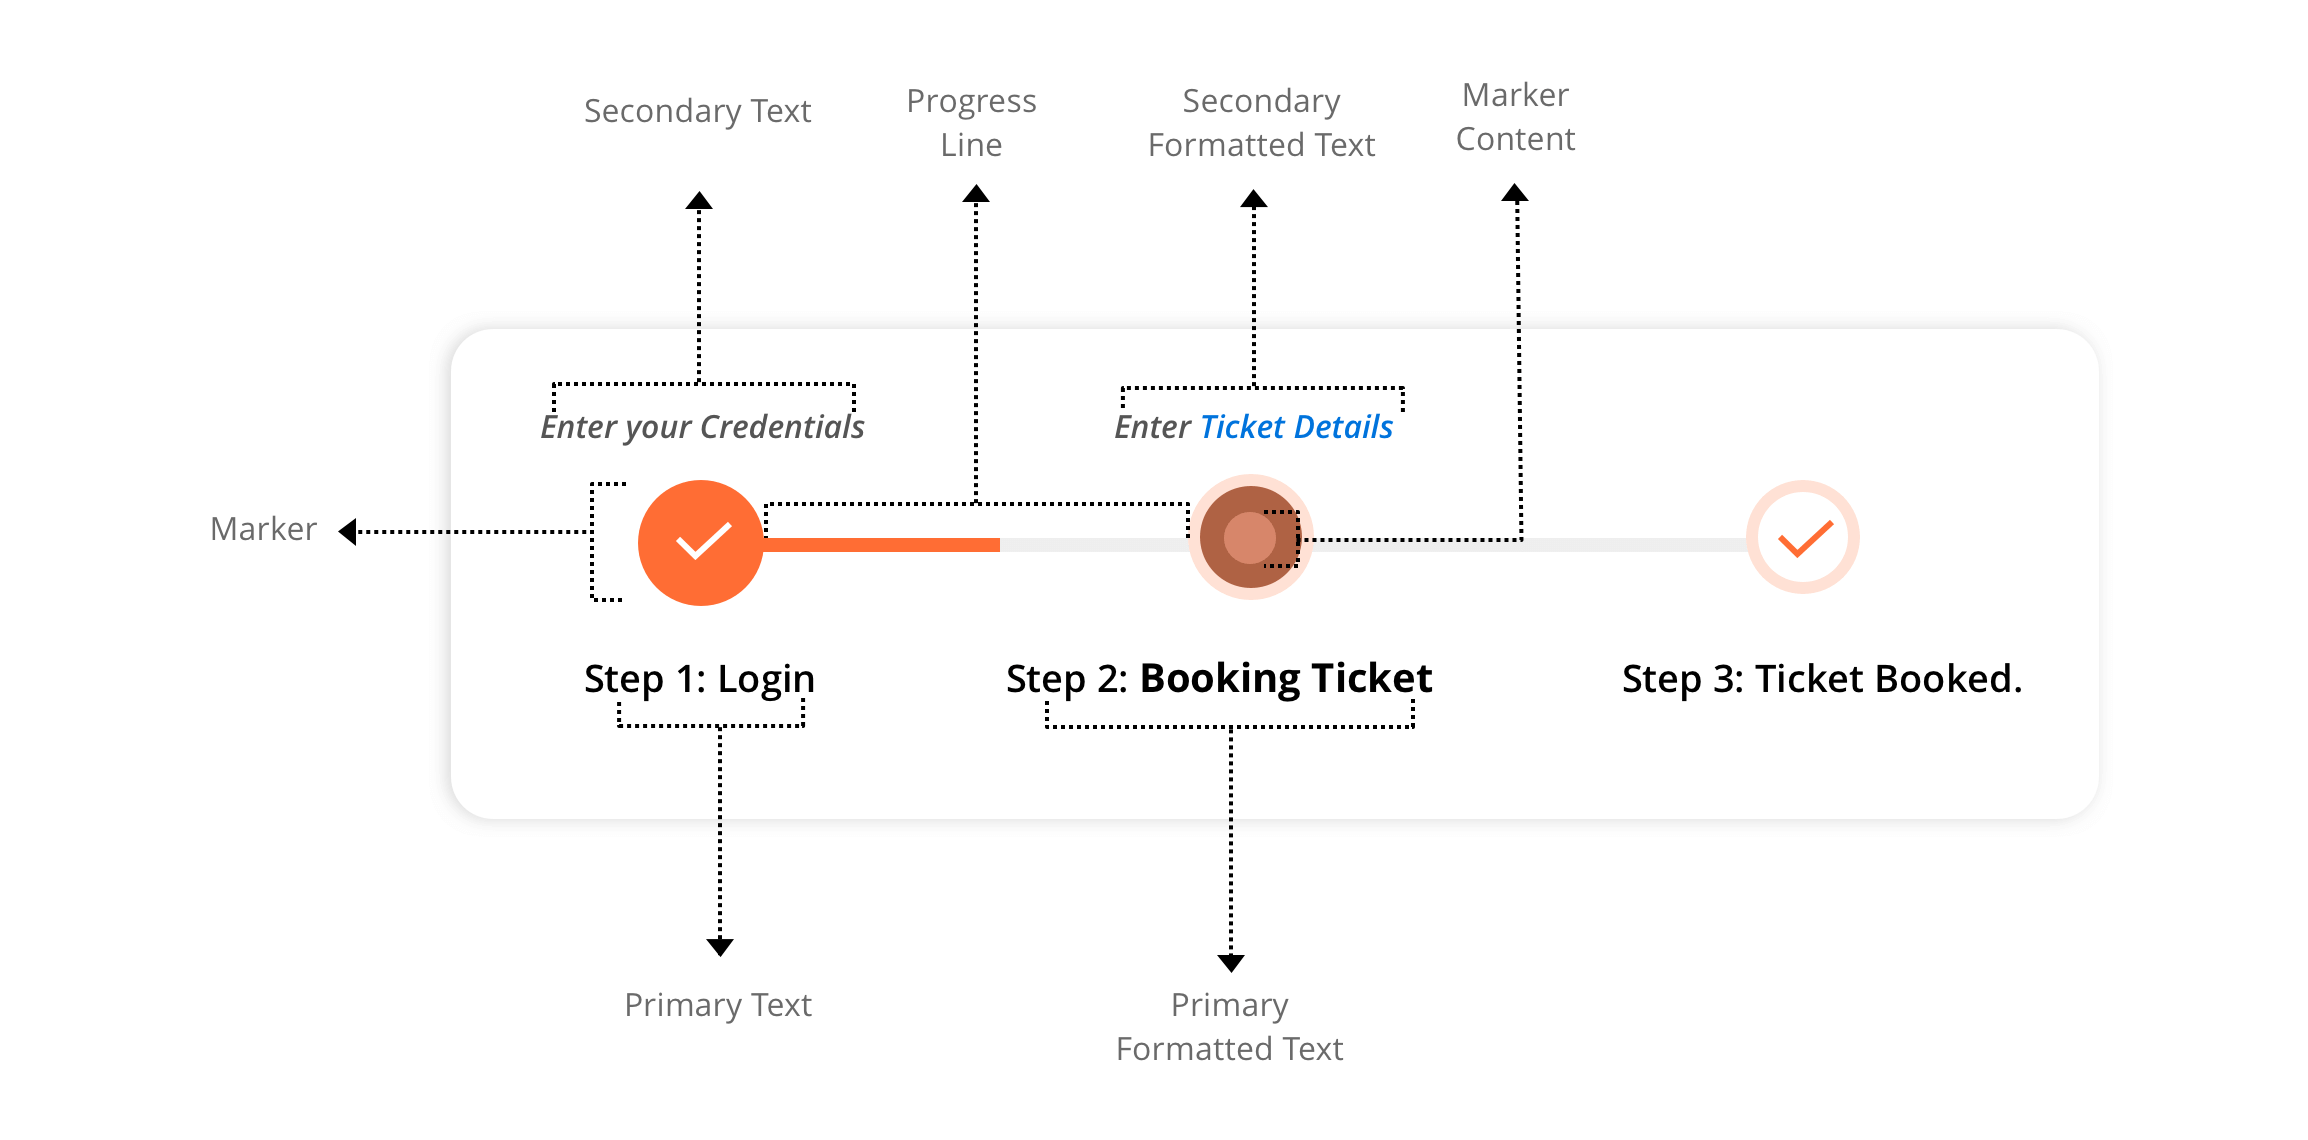
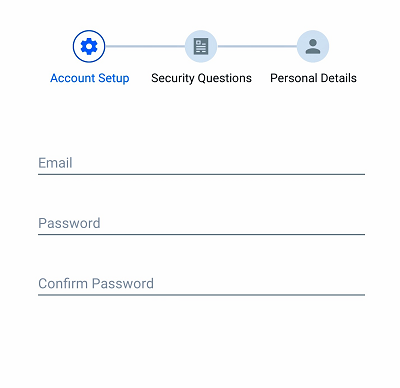
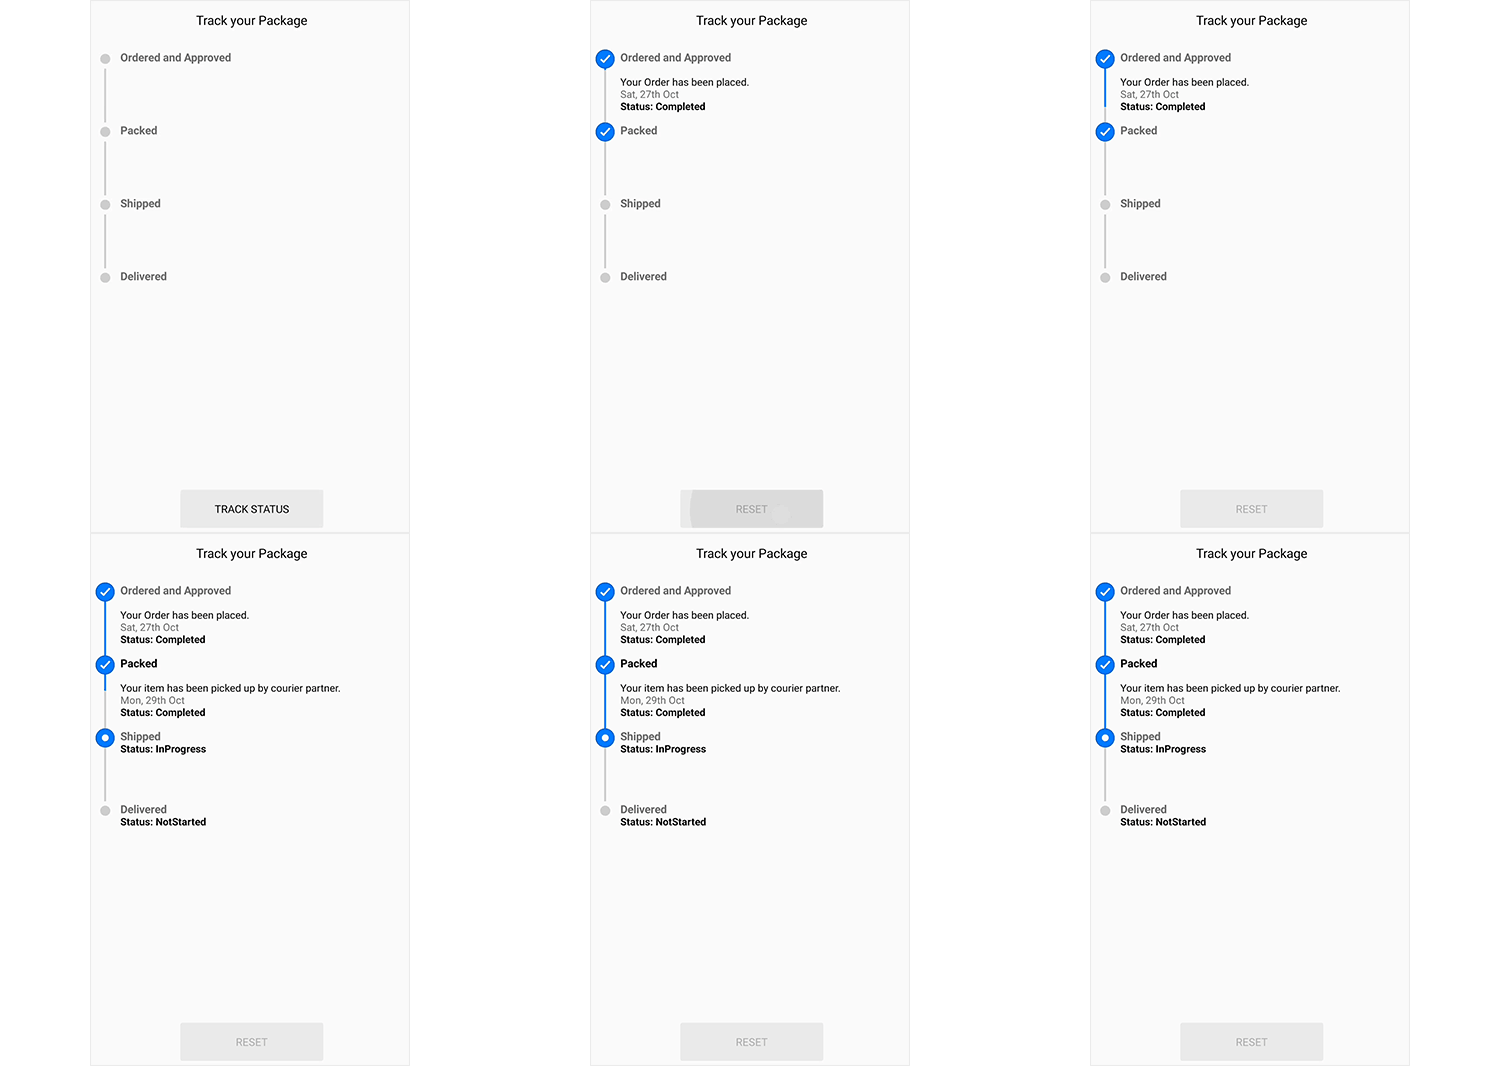
The Xamarin.Forms Step Progress Bar is a control that indicates the progress of a multiple-step (state) process, such as new-user registration or package status tracking. You can customize its appearance by changing step shape, step content, progress bar color, and more. In this blog post, we will summarize the key features of the Xamarin.Forms Step Progress Bar control.StepProgressBar Control Overview

Step Progress Bar Control Overview

Orientation

Since a multi-step process can progress in a horizontal or vertical direction, we have provided orientation support for both.Horizontal StepProgressBar Control

Horizontal Step Progress Bar Control

Vertical StepProgressBar Control

Vertical Step Progress Bar Control

Status

A step has three statuses: not started, in progress, and completed. Based on the status, you can format a step with different styles, which means whenever the status of a step changes, the style of the visual will change synchronously.Steps in Not Started Status

Steps in Not Started Status

Step description

Each step in a multi-step process has a different operation. To provide self-explanatory information about a step, a step description can be shown on either side. A primary description will be on the right or bottom of the step, and a secondary description will be on the left or top of the step.

We extended this feature by providing additional support where the FormattedString class can be provided as an input for both descriptions. You can customize these descriptions with different formatting styles.Step Descriptions

Step Descriptions

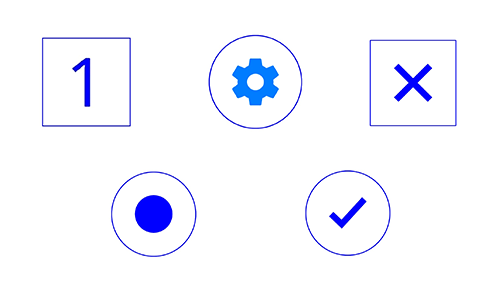
Marker shape

The shape of a step marker can be a circle or a square.Step Markers

Step Markers

Content type

You can customize the step content with numbers, ticks, crosses, dots or images.Step Content

Step Content

Style

The Xamarin.Forms Step Progress Bar control allows you to customize a step based on its status. Define an individual style for each status to achieve this. Marker color, marker shape type, marker content color, marker content type, marker stroke color, marker stroke width, marker size, marker content size, progress line color, and font can be defined for a style.Style applied to Step Progress Bar

Style applied to Step Progress Bar

Getting started with StepProgressBar

This section shows you, step by step, how to implement a Xamarin mobile application with the Step Progress Bar Control.

  1. Create a blank Xamarin.Forms application.
  2. In the application, refer to the Xamarin.SfProgressBar NuGet package from nuget.org. To learn more about SfStepProgressBar, refer to “Adding SfStepProgressBar reference” in Syncfusion’s documentation.
  3. When deploying the application in UWP and iOS, please follow the steps provided in “Launching the application on each platform with StepProgressBar,” which is also found in Syncfusion’s documentation.
  4. Import the progress bar namespace in your respective page as demonstrated in the following code sample.
xmlns:progressBar="clr-namespace:Syncfusion.XForms.ProgressBar;assembly=Syncfusion.SfProgressBar.XForms"

Then, initialize SfStepProgressBar as shown in the following code.

<progressBar:SfStepProgressBar HorizontalOptions="Center" VerticalOptions="Center">
    <progressBar:StepView PrimaryText="Step 1" />
    <progressBar:StepView PrimaryText="Step 2" />
    <progressBar:StepView PrimaryText="Step 3" />
    <progressBar:StepView PrimaryText="Step 4" Status="InProgress" />
    <progressBar:StepView PrimaryText="Step 5" />
</progressBar:SfStepProgressBar>        

And, that’s how to add the StepProgressBar control to an application.Step Progress Bar

You can download the getting started sample from this GitHub location.

Conclusion

In this blog post, we had a quick overview of the Xamarin.Forms Step Progress Indicator control, that is available from 2019 volume 2 release. We invite you to check out all our Xamarin.Forms controls. You can always download our free evaluation to see all our controls in action. Feel free to explore our samples on Google Play and the Microsoft Store. To learn more about the advanced features of our Xamarin.Forms controls, refer to our documentation.

If you have any questions or require clarification regarding this control, please let us know in the comments section. You can also contact us through our support forumDirect-Trac, or feedback portal. We are always happy to assist.

The post Introducing Step Progress Bar for Xamarin.Forms appeared first on Syncfusion Blogs.

Whats New in 2019 Volume 2: Syncfusion Xamarin Highlights

$
0
0

As an addition to our contribution to the Xamarin community, here comes the next major update of our Xamarin platform with new components, exciting features, and more! In this blog, we will walk through the new components and major features included in our 2019 Volume 2 release.

New components : Switch and StepProgressBar

We closely monitor the requirements of the Xamarin community and introduce new components in almost every release. As a part of this, we are adding two more components to our list of beautiful UI controls.

Switch

As the name suggests, the Switch control allows you to turn an item on and off and change its UI accordingly. Though this component is already available in Xamarin.Forms, we understood the need for more features in it. Therefore, we introduced a new Switch component with a rich set of features, such as multiple default styles (as shown in the following image), an intermediate state, orientation support, gradient design, RTL support, and the list goes on. To learn about all the features of our new Xamarin.Forms Switch component, refer to our recent blog post.

Xamarin.Forms Switch

Different Switch Styles

StepProgressBar

A StepProgressBar is usually seen in mobile applications used for ticket booking and online purchasing. It is useful in showing the completion of a multistep process in a small UI space, which is very important in mobile applications.

Knowing its usage in modern applications, we have added a new Xamarin.Forms StepProgressBar control in this release. The important features of the StepProgressBar include orientation support, multiple marker shapes, beautiful animation on step changes, and more. To learn about all the features available in this control, refer to our recent blog post.

Xamarin.Forms StepProgressBar

StepProgressBar Control

Charts for WPF, waterfall series, and more!

We step into the Xamarin.Forms WPF platform with your favourite Syncfusion Charts control and all of its features. The new project configuration is pretty simple, and if you are already an existing charts user, that is all you will need to do. Everything will just work without making any changes.

We have also added a waterfall series to our ever-growing collection of chart types. To learn more about the other items included in this release, you can peruse our separate “What’s New blog about our Xamarin Charts“.

Support for more controls in Text Input Layout

Our Text Input Layout control now supports Autocomplete and ComboBox as its input control. Additionally, there is an option to have the editors of the DataForm control in the Text Input Layout design by making a few changes in your application.

To see more details about this feature, refer to the blog “Modernize Xamarin.Forms DataForm, Autocomplete, and ComboBox using Text Input Layout“. Even if you are new to the Text Input Layout, you will get a detailed picture of this beautiful little wizard once you read the blog.

Other release blogs

Here are some additional blogs about new controls and features in our 2019 Volume 2 release:

Conclusion

In this blog post, we have walked through some of the major updates in our 2019 Volume 2 release for Xamarin. Remember that this is just an overview and there are lot more features in store than what we have discussed here. Check out the What’s New and Release Notes pages to read about all the items included. You can also have a hands-on experience by checking out our samples available on GitHub.

If you have any questions or require clarifications about these features, please let us know in the comments section below. You can also contact us through our support forum, Direct-Trac, or feedback portal. As always, we are happy to assist you!

The post Whats New in 2019 Volume 2: Syncfusion Xamarin Highlights appeared first on Syncfusion Blogs.

Webinar Q&A: How to Manage and Track Projects with Our Gantt Chart

$
0
0

In Syncfusion’s latest webinar, “How to Manage and Track Your Projects Efficiently with the Gantt Chart,” product manager Bharath Marimuthu, a developer skilled in the intricacies of advanced timeline and column filtering, demonstrates how those features can be used in the Syncfusion JavaScript Gantt Chart. He also explains how the chart’s modular architecture makes managing and tracking projects easy.

Tune in to our YouTube channel to watch the video, or watch it here:

The following questions and answers were taken from the webinar’s Q&A segment:

How do Gantt variables connect with C# code?
Syncfusion’s Gantt Chart is available for ASP.NET Core and ASP.NET MVC. You can initiate and work with Gantt charts using server-side C# code.

ASP.NET MVC
Samples: https://ej2.syncfusion.com/aspnetmvc/Gantt/DefaultFunctionalities
Documentation: https://ej2.syncfusion.com/aspnetmvc/documentation/gantt/getting-started

ASP.NET Core
Samples: https://ej2.syncfusion.com/aspnetcore/Gantt/Default
Documentation: https://ej2.syncfusion.com/aspnetcore/documentation/introduction/

How does the Gantt Chart perform in .NET Core for a generic display with 2,000 tasks?
For now, Syncfusion’s Gantt Chart takes a few seconds to load 2,000 tasks. Since it’s a preview version, we haven’t implemented many performance optimizations yet. We are currently working with a virtualization rendering mode to load a large number of tasks. We will launch this feature in the upcoming release of Essential Studio 2019 Volume 3, which is expected to roll out at the end of September.

Is it possible to split a task on a single row so that you can assign different resources at different time periods?
At this moment, we don’t support splitting tasks, but we will consider it as a feature request and implement it in an upcoming release.

Is it possible to import or export with Microsoft Project?
Yes, it is possible to import or export .xml files with Microsoft Project using Essential ProjIO.

Where can I find information on Microsoft exporting?
We will soon publish information regarding exporting and importing in our online user guide. For now, if you create a support ticket, we’ll reply with a sample solution.

When will the JavaScript version be the same as the jQuery version?
We are fully committed to porting all the features we can from our jQuery version to the JavaScript Gantt Chart. Right now, our JavaScript Gantt Chart is a preview version with basic functionality and common features. We are implementing additional features and functionalities. We plan to ship all features in our Volume 4 release in 2019.

Is there a trial version?
Yes, you can find the trial version for the Syncfusion Gantt Chart at the following links:

The post Webinar Q&A: How to Manage and Track Projects with Our Gantt Chart appeared first on Syncfusion Blogs.

Viewing all 473 articles
Browse latest View live